6 Best Ways To Remove Backgrounds In Photoshop in 2022

According to Kellyheck photography, 67 percent of customers believe that the quality of a product’s image plays a “significant” role in the product they choose and eventually buy. And can you guess what prompted them to purchase the goods? Of course, an eye-catching picture is an answer.
When it comes to expressing our feelings and thoughts, photos are the most effective medium in the commercial world or on social media. People are now modifying their photos with apps that can make them look more attractive and engaging to viewers. We may view things with a high degree of graphic detail both online and on television. It is not just possible to handle simple applications; in this case, you need a photoshop tool to achieve such editing outcomes.
A photo can become attractive in many ways, and removing the background is one of them. Though, there are several methods for removing the background from a photograph that are available. This article will go over the top 6 ways to remove the background in Photoshop.
What is the Importance of Removing Background?
Contents
The primary goal of removing the background is to make the image more understandable to the viewer. But this method is mainly used in professional settings. A professional picture keeps customers engaged in your business.
Moreover, with the help of the background removal method, it is possible to focus the viewer’s attention on any particular object. If the backdrop of a photograph is removed, the image will appear more appealing. Product pictures can benefit from the use of this approach.
Therefore, credibility is also important in establishing a business. As a result, when you frequently use a white background, your organization becomes more trustworthy. On this subject, there are numerous points of view. A dedicated photographer always prefers a white background over a random one. Using the backdrop removal method can improve the credibility of your photograph.
However, sometimes a photograph contains many distracting elements, and to solve this problem, you don’t need to spend money or do a re-shoot. Using the backdrop removal approach is enough in this case.
Removing Background In Photoshop: 6 Best Ways
Here are the ways of removing the background:
#1 The background removal tool in Photoshop
Using this method, you can quickly delete the backdrop of your photograph in Photoshop. If you do not want imperfections in your picture, this method is for you.
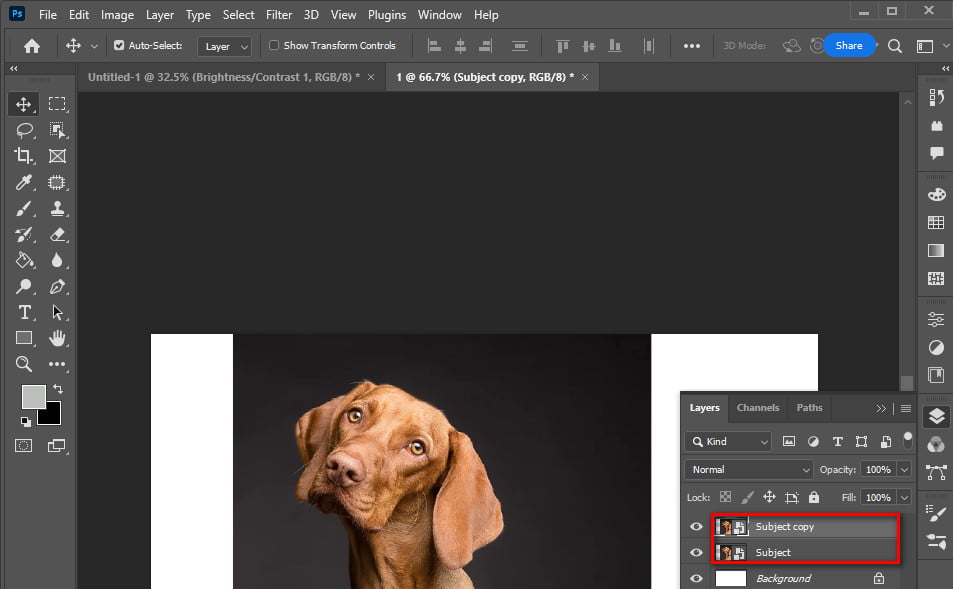
To continue, open your image in Photoshop and click on the layers tab on the right side of the screen. Next, press Command+ J on Mac OS or CTRL+ J on Windows to duplicate the current layer.
Lastly, click the Remove Backdrop button in Photoshop’s Quick Actions box to complete the background removal process.
#2 Usage of the Quick Selection tool
Photoshop’s Quick Selection Tool applies artificial intelligence to identify the borders between the subject and background.
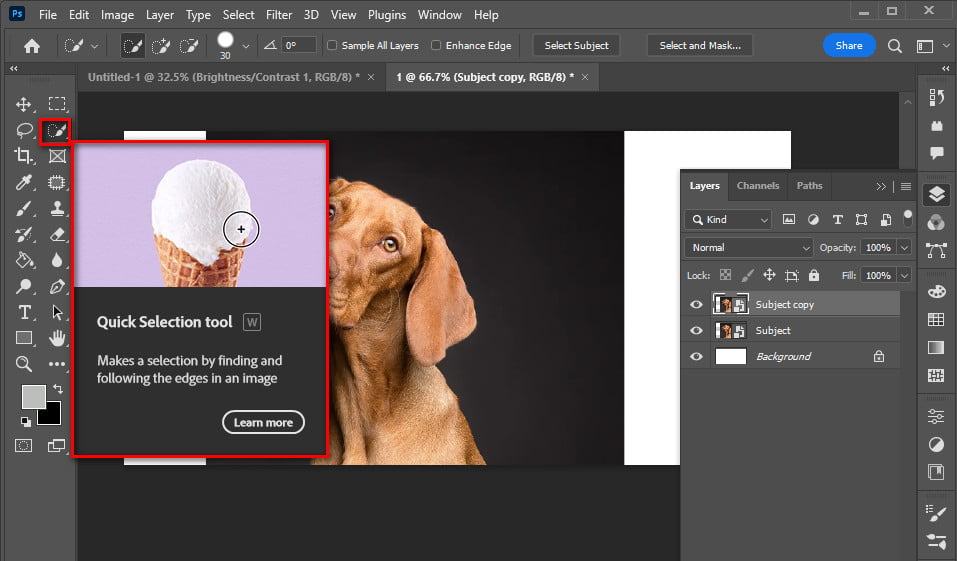
When using this tool, ensure that your original image selections are as clear as possible. Because adding and deleting elements can take several hours if too many pixels look similar.
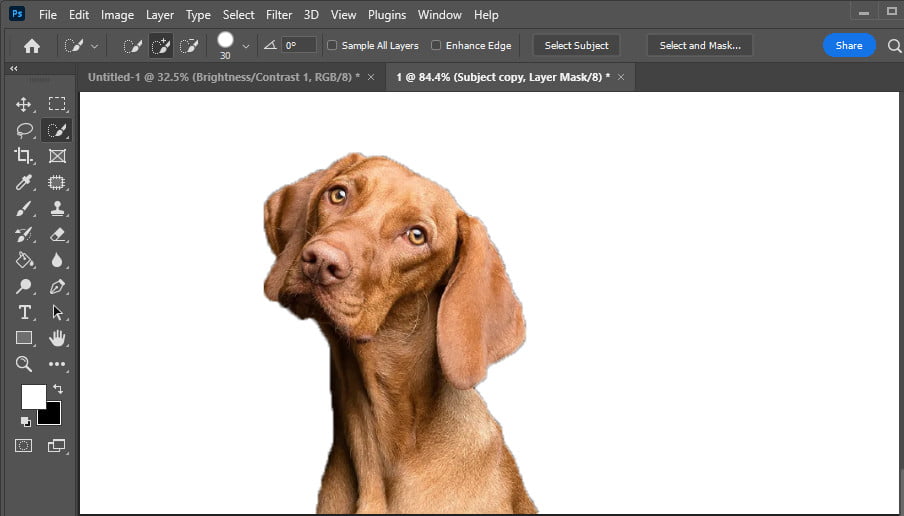
To use this method, use Photoshop to open your image from the left-hand menu and look for the “Quick Selection Tool.” The Magic Wand Tool could be a place to put it. Improved selection edges can come up to perfection if you enable the enhanced edge option.

Then, click the button and drag the mouse pointer over the area you want to change. Until Quick Selection identifies an edge, the program will keep searching for tones that match the selection. Consider whether you’d like to include anything else. Then just click and drag the cursor to a new location.
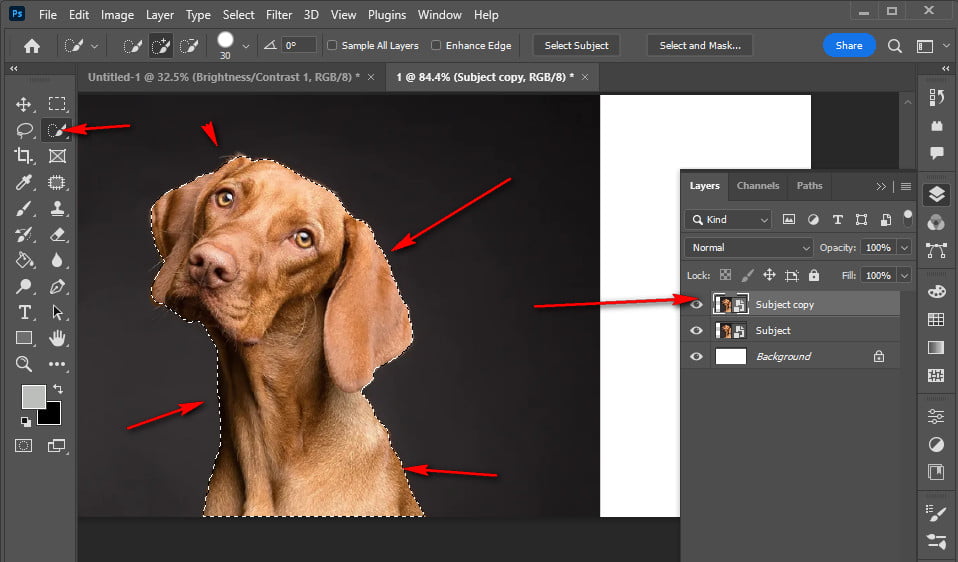
If the tool was overly enthusiastic, you can deduce this from the selections. Tap the Option key (macOS) or Alt key (Windows) to deselect the portion you want, then move over and press the Delete button.
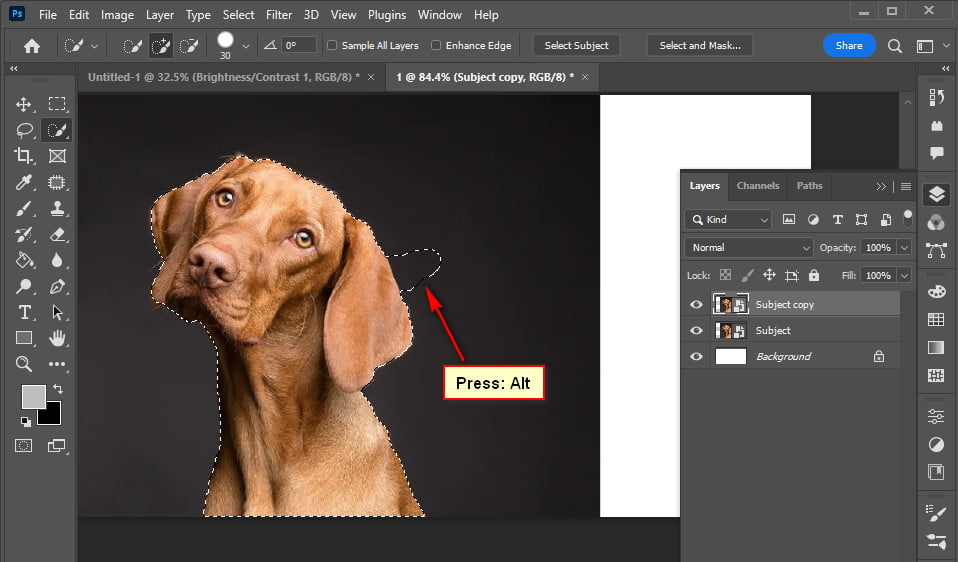
Alternatively, you can deselect (minus) whatever you mouse over by switching to the tool’s deselection mode (minus).
#3 Application of the remove.bg Photoshop plugin
Bg’s Photoshop plugin is the best approach to removing the background from any picture. For example, hair can be removed by using the plugin rather than other software. In this case, using a layer mask, you can erase or restore areas of the image.
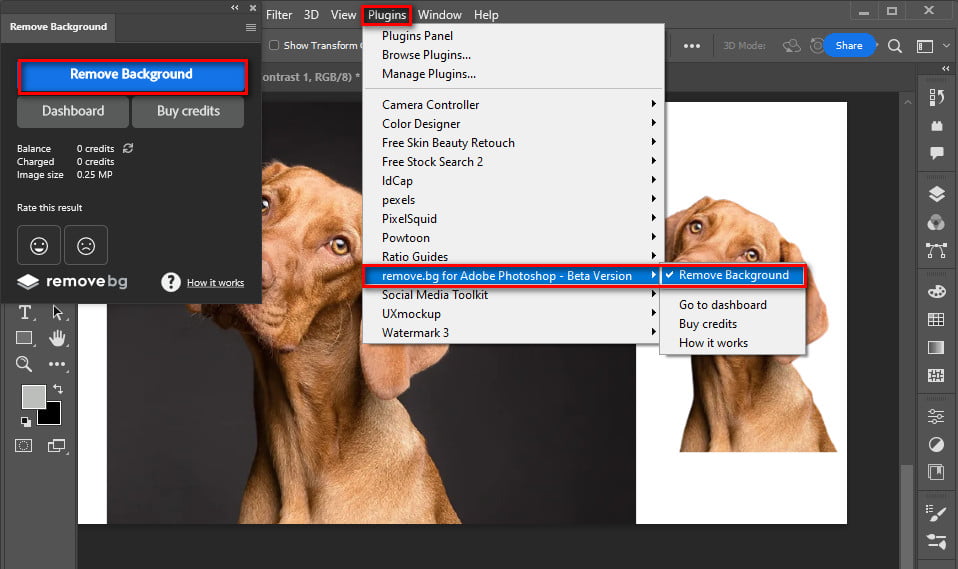
To use this plugin, download it as it is free. Additionally, you can buy the premium one. After installation, Remove.bg can be found in the Plugins drop-down menu.
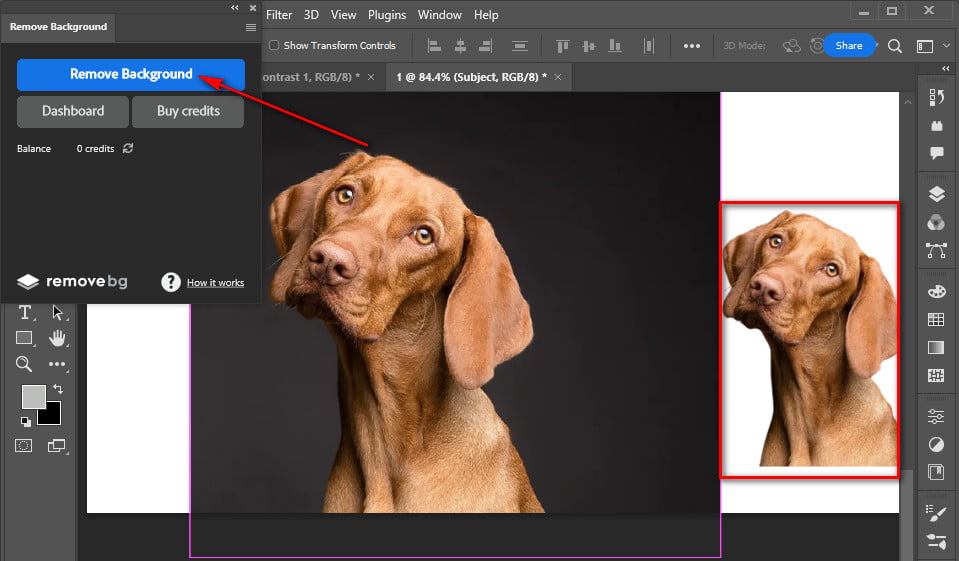
Remove the backdrop from a Photoshop image by logging onto your remove.bg account, then click the “Remove Background” option. As a result, a working internet connection and an API key are required in order to process the image. Using the service is free for the first month, and you’ll receive 50 free API requests per month for preview photographs.
#4 Usage of the Eraser Tool
Using the Background Eraser tool to get more control over background removal in Photoshop is a good idea. If you want more control over your photographs, you need to invest your time. In such a case, using the Background Eraser tool is a time-saver and will give you a satisfying result.
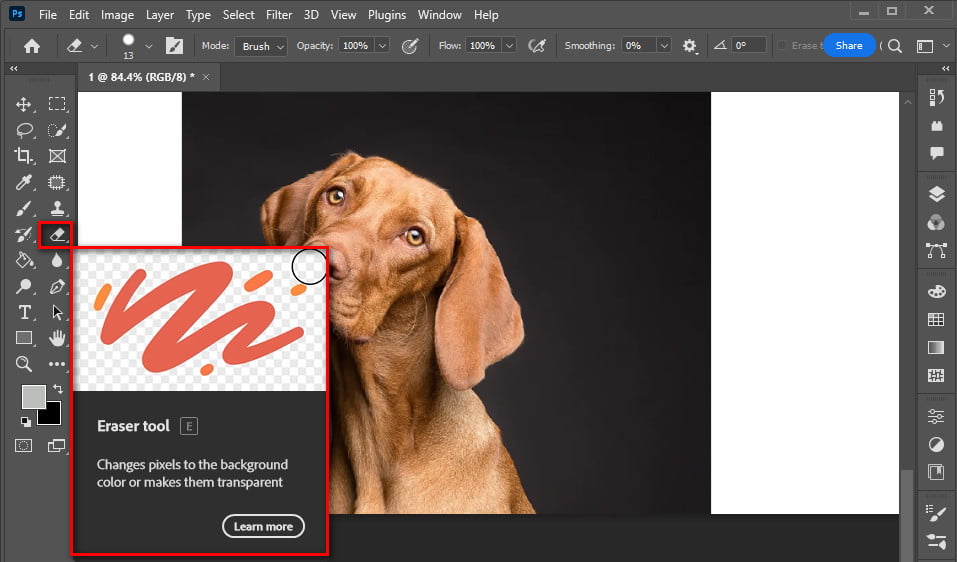
To use this tool, right-click the background layer in Photoshop and select Duplicate Layer. Simply type a name for your layer in the dialog box that appears and click OK to save your changes. You can disable it by clicking the eye icon to the left of the original layer.
Right-click in the Toolbox and select Background Eraser. This tool may be concealed beneath the eraser tool in some cases. The Background Eraser tool can be selected by holding down the Eraser tool while clicking and dragging to expose more options.
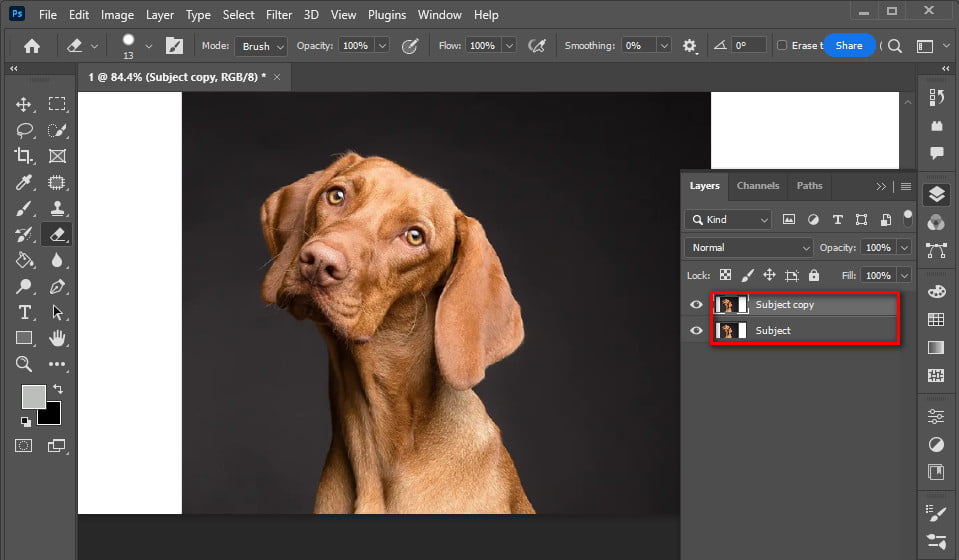
The brush panel can be accessed by clicking the brush icon in the tool choices bar at the top of the screen to get a near-to-maximum hardness level. It is determined by the image you are dealing with.
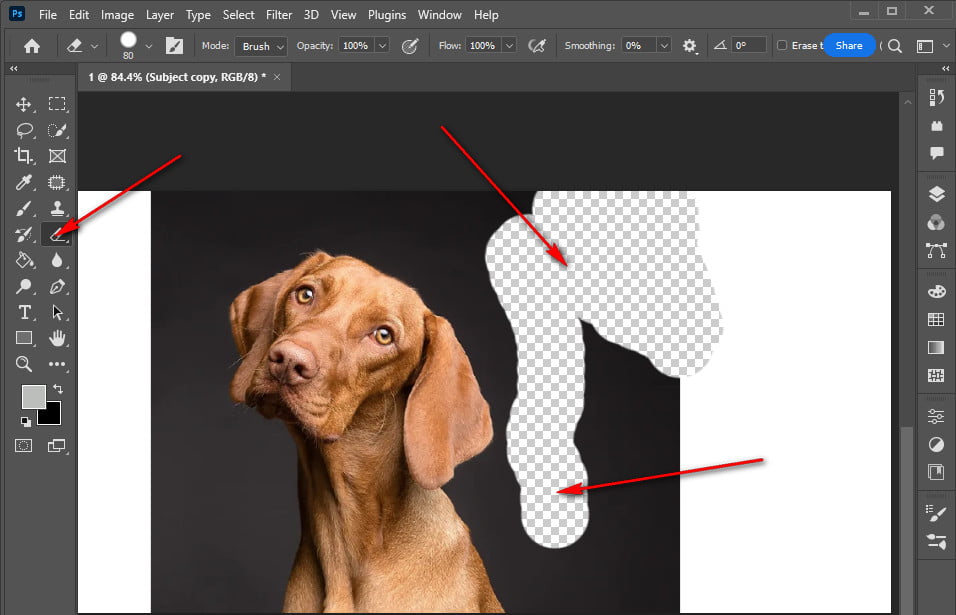
While removing the background choice bar at the top, select Continuous sampling. The brush size option is the second of three icons. Once you’ve done that, choose a tolerance of 20–25 percent for the limits to find edges.
You will notice a narrower variety of colors if your tolerance is low. On the contrary, the more tolerance the tool has, the more colors it will choose.
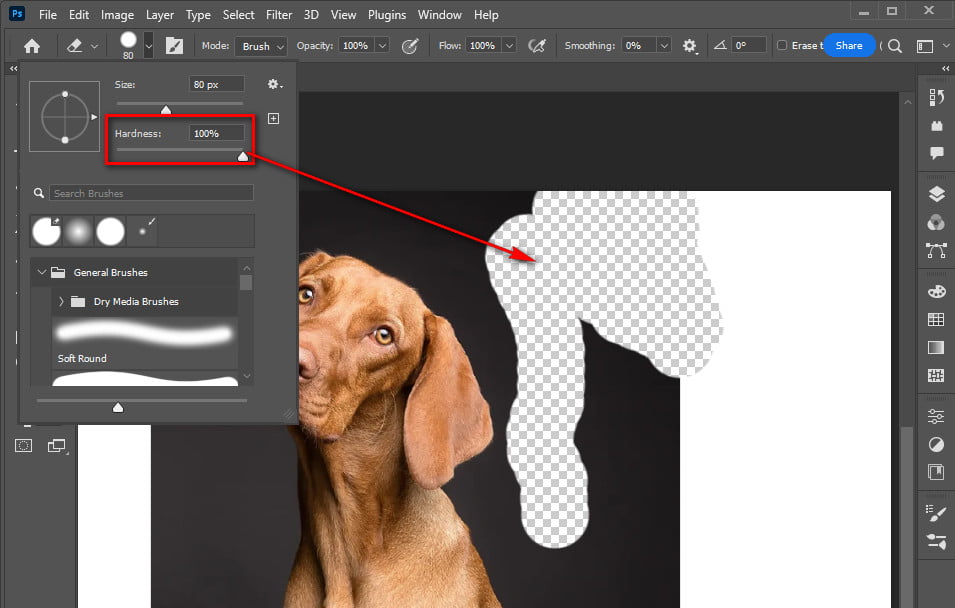
To remove the background around your subject, use the Backdrop Eraser tool and click and hold while moving the brush. The goal is to keep the tool’s markers from meeting your target. You can magnify the image permanently if you wish to look at something more closely.
You can always undo a brush stroke if it goes too far if you make little strokes with the brush. You may need to modify the size of your brush as you proceed through the more challenging spots.
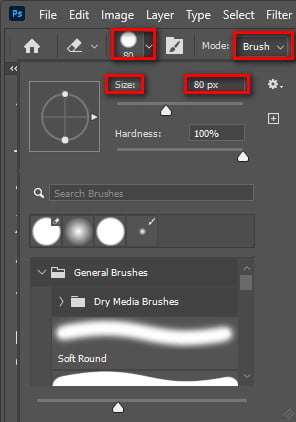
If you wish to adjust the size of your brush, follow these steps. You may either return to the toolbar at the top or use [&] to alter the size.
Try reversing your previous activity first to see if that fixes the problem. Adjust the sample to once, the boundaries to discontiguous, and the tolerance to around 10% in the tool settings bar at the top.

When you select these settings, the brush won’t. It will resample as you move and will just utilize the color that is now beneath the crosshairs when you use it.
According to your image, this technique might be fast or lengthy, but either way, it produces good results.
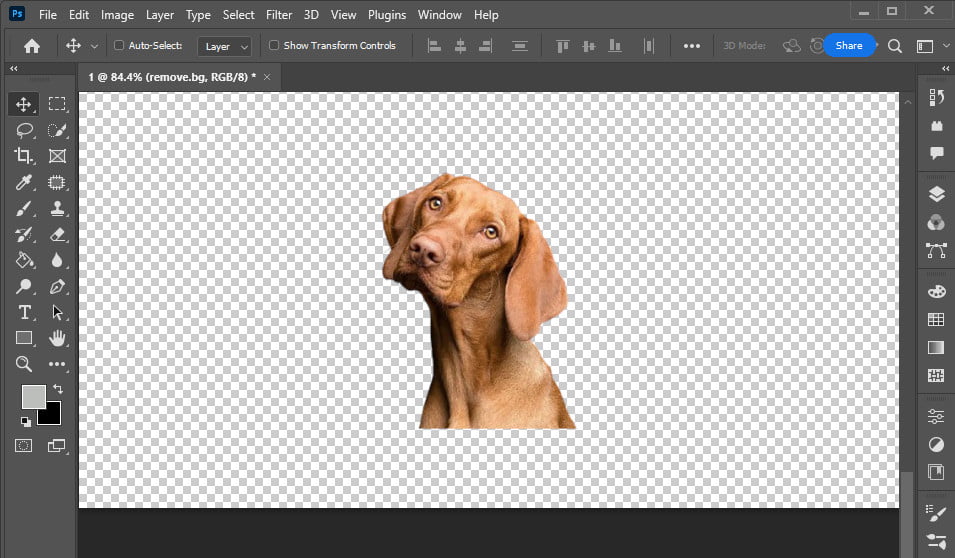
#5 Using the pen tool technique
Photoshop’s Pen tool is a very traditional method for erasing backgrounds from photos. The Pen Tool is the most time-consuming, yet it is a master tool.
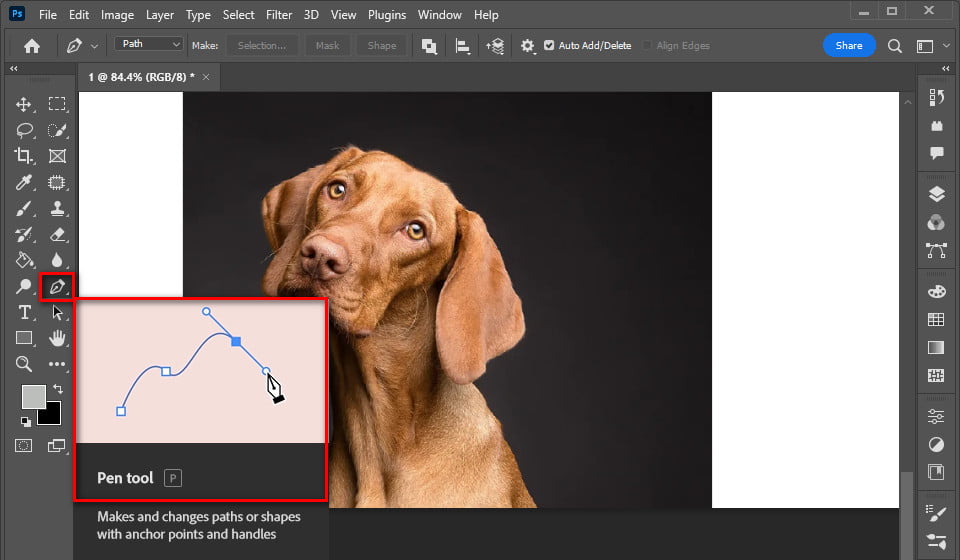
Right-click the background layer in Photoshop and select Duplicate Layer. Click OK to close the dialog box, and then name your layer. You can disable it by clicking the eye icon to the left of the original layer.
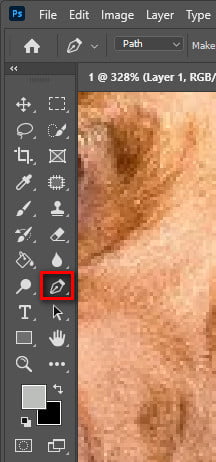
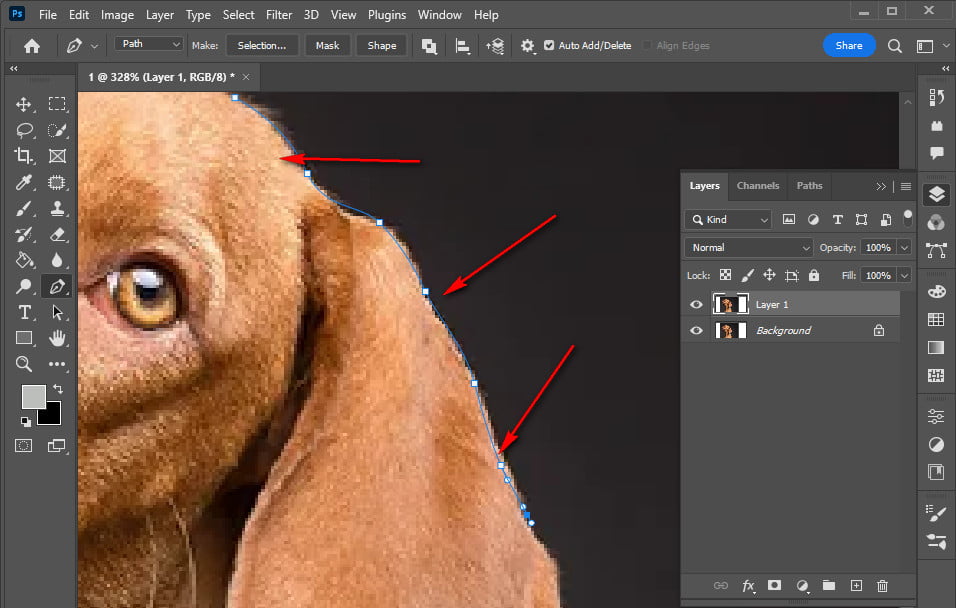
The Pen tool can be found in the toolbox on the left. Start by zooming in on a certain part of your image. Begin by clicking on the edge of your subject to begin the first anchor. Afterward, you can begin to outline your subject by adding additional anchors.
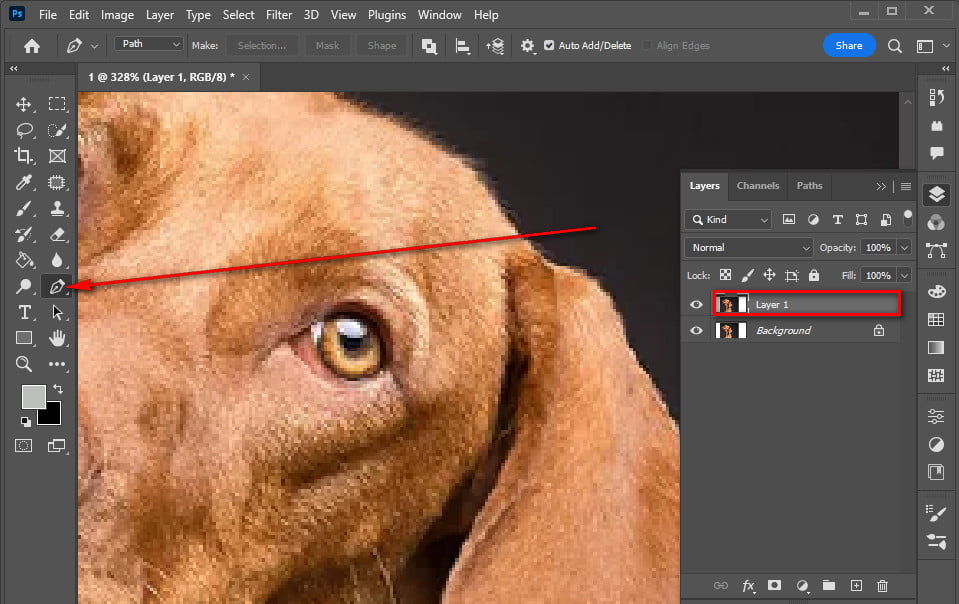
Use click-hold-drag to create a curved line, and then move the mouse to fine-tune the angle if necessary. To fine-tune an anchor point or direct lines, use the “Direct Selection” tool in the toolbox.
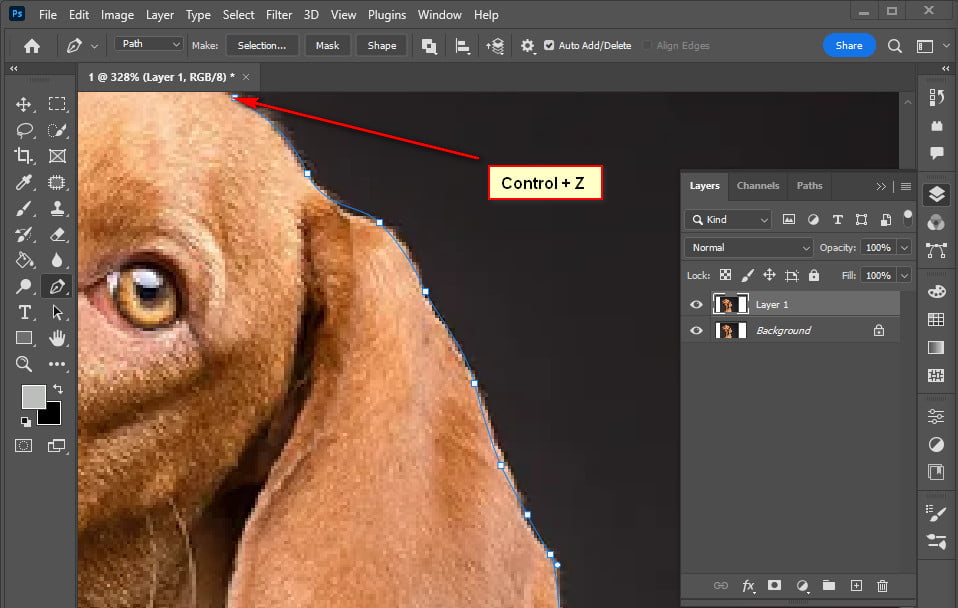
A keyboard shortcut (Command + Z for Mac and Control + Z for Windows) or File > Undo can be used to undo an anchor. Once you’ve completed it, be sure to return to your starting place.
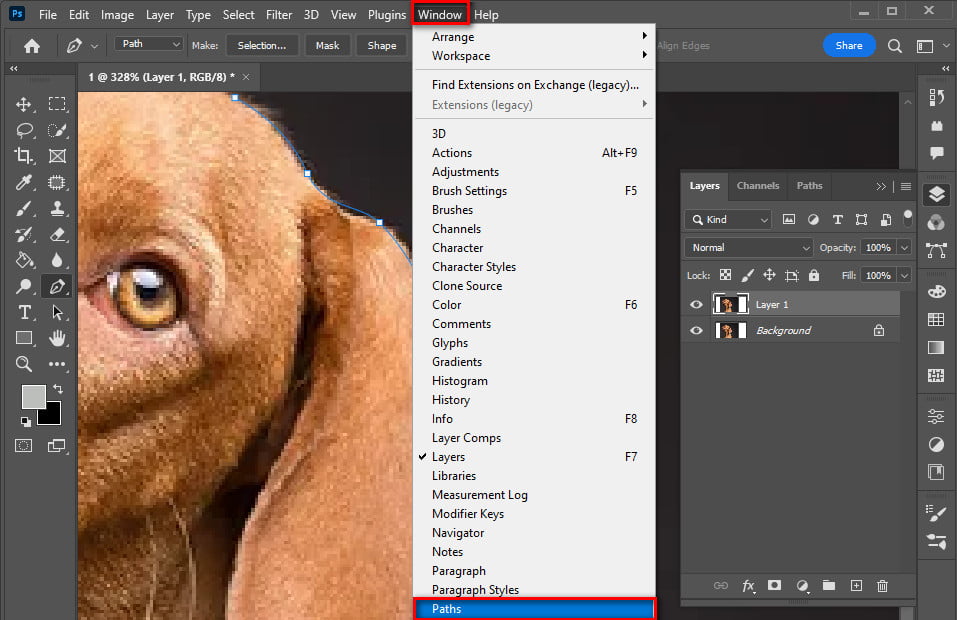
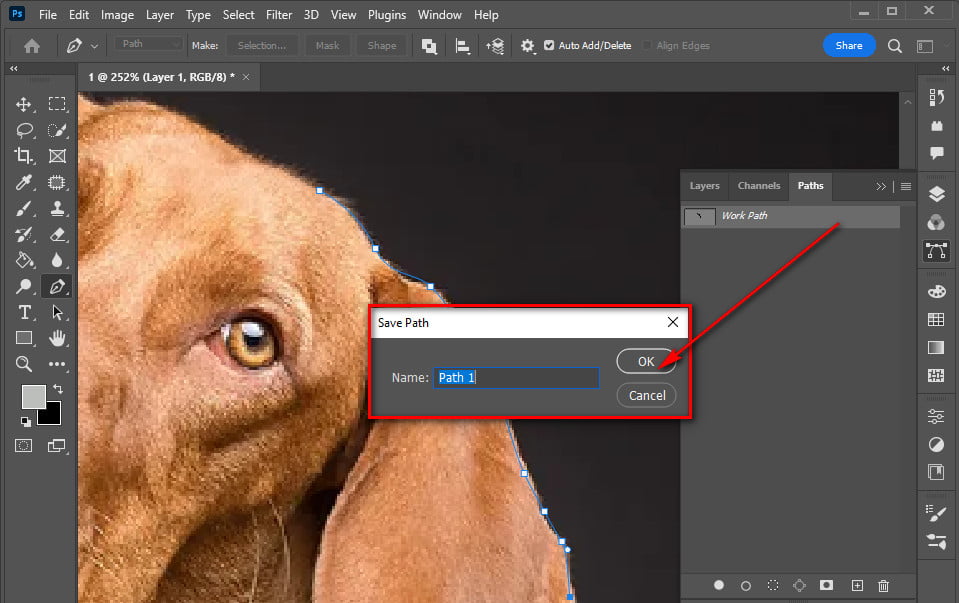
Once you’ve completed it, be sure to return to your starting place. Save the path to preserve it once you’ve completed it and are satisfied with the results. To see the Paths panel, select Window > Paths from the menu bar. Create a new path by clicking the three-bar menu on the right and selecting New Path. The Paths panel now has your path saved.
Right-click your new route, pick Make Selection from the Paths panel, and click OK in the dialog box to save your selection.
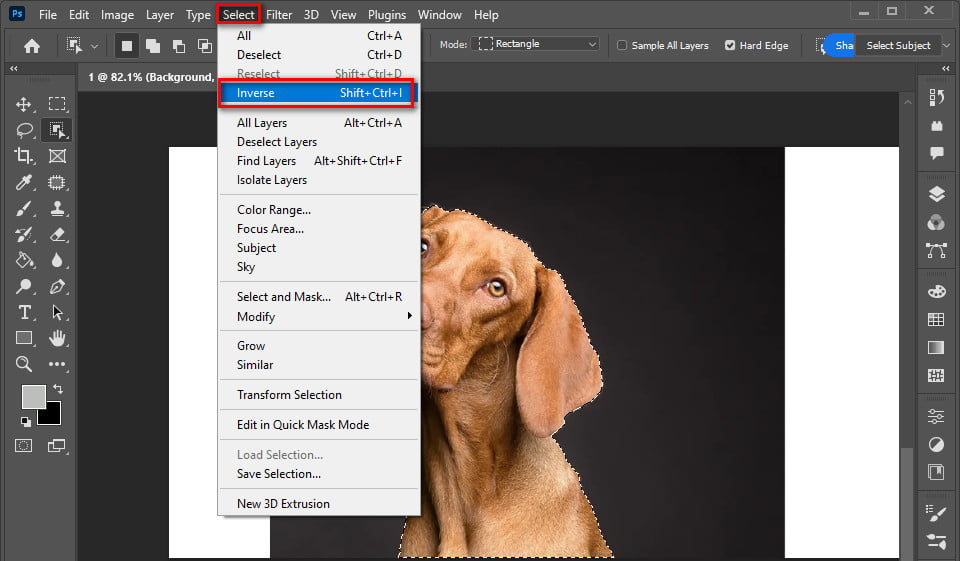
To avoid erasing what’s already in the selection, we’ll need to adjust it to exclude the subject from the list of options. Select Inverse from the menu. If you look closely, you’ll notice that the marching cursor has encircled and selected everything in this photograph, including the subject.
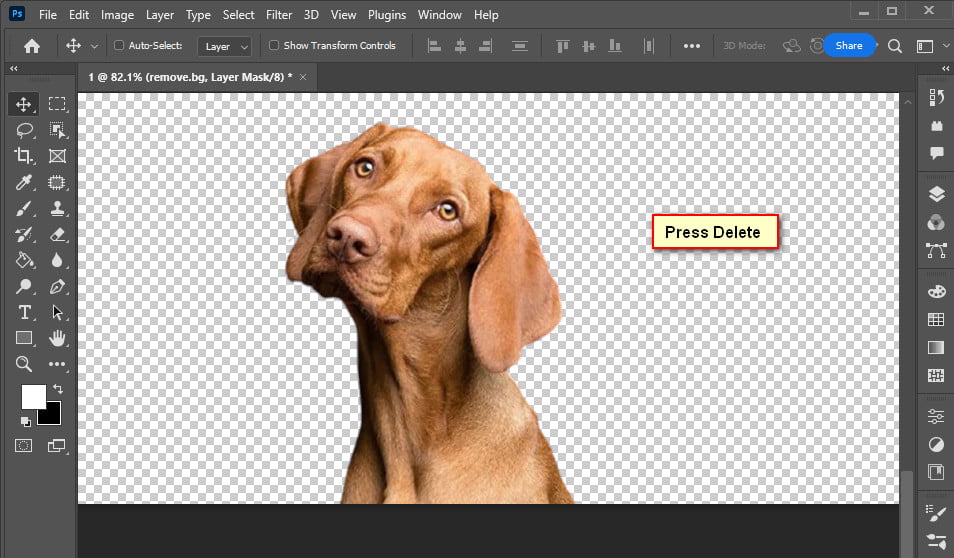
Press Delete to remove the backdrop. Rather than your previous background, you should now see a white/gray striped pattern.
#6 Usage of the Magnetic Lasso tool
You can use the Magnetic Lasso tool if you find the Pen tool too time-consuming. To use this tool, right-click the background layer in Photoshop and select Duplicate Layer. Close the dialog box by clicking OK, and then name the layer. When you click the eye icon to the left of the original layer, it will be turned off.
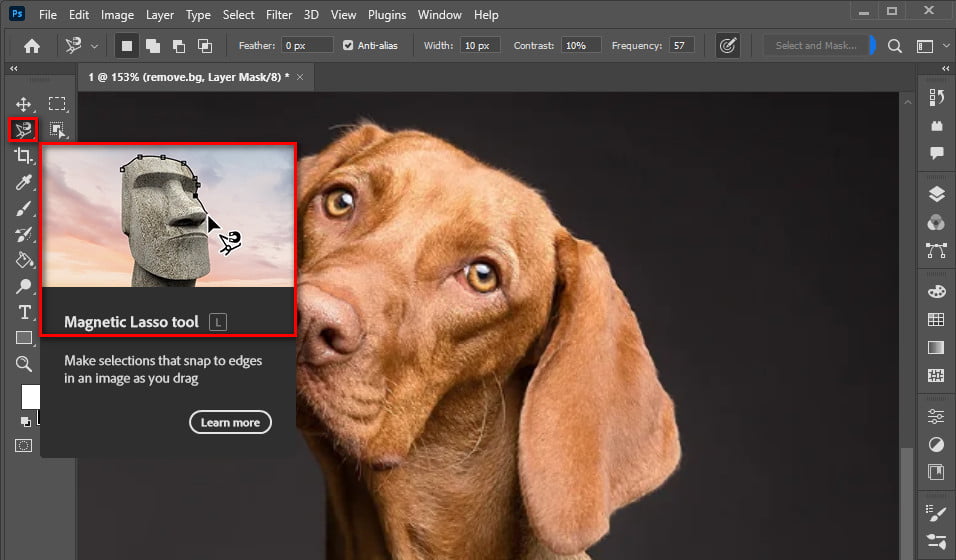
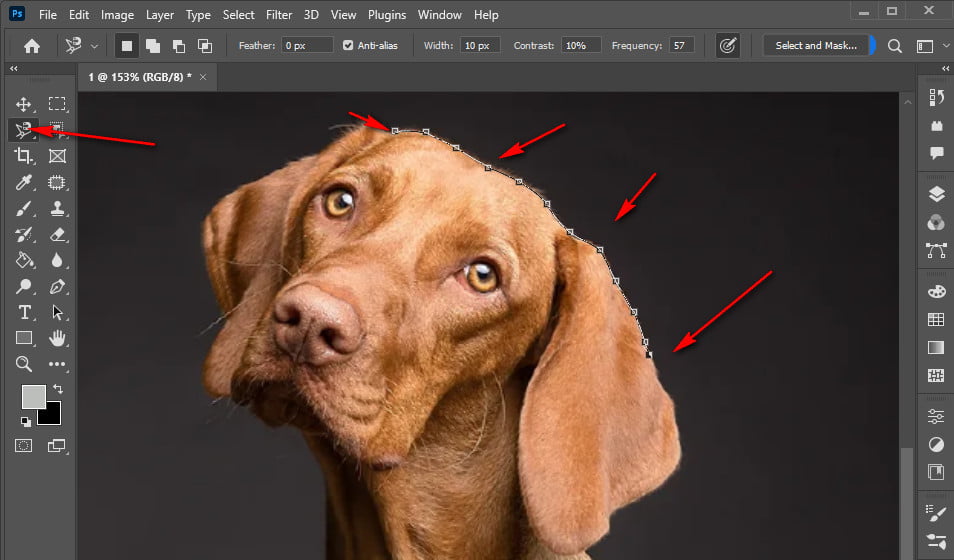
Click on the left toolbox and select it to use the Magic Lasso tool. You can use the tool to trace around the perimeter of your topic. As you move your cursor, it will begin to create the trail for you. You’ll need to keep patience in this situation since you’ll need to work slowly, steadily, and methodically.
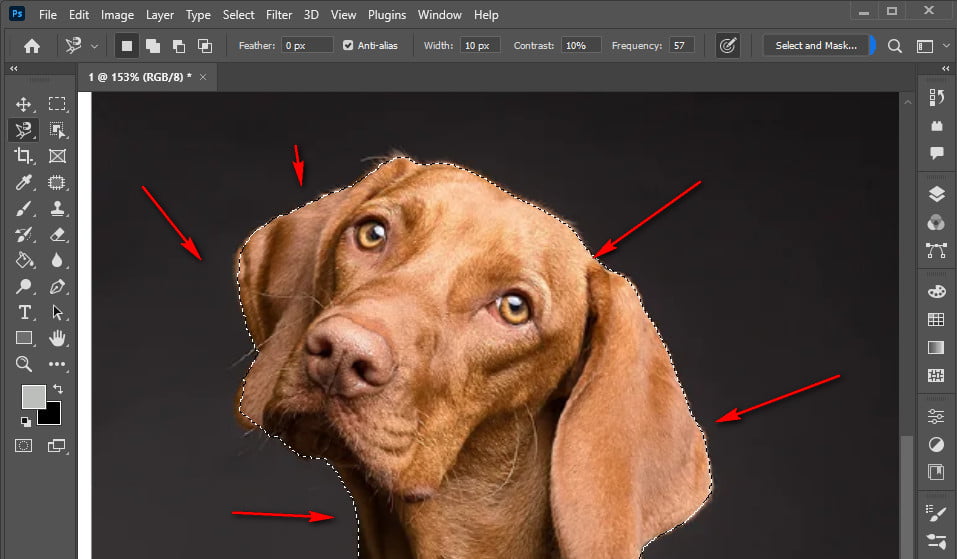
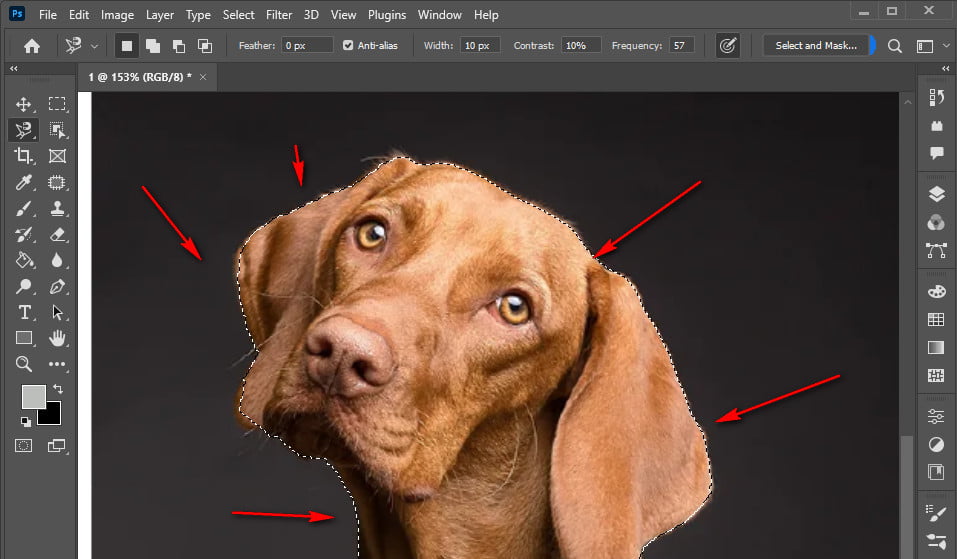
When you’ve launched the tool, you’ll need to circle your subject and connect back to where you started. Return to the beginning by clicking on the starting location when you’ve completed.
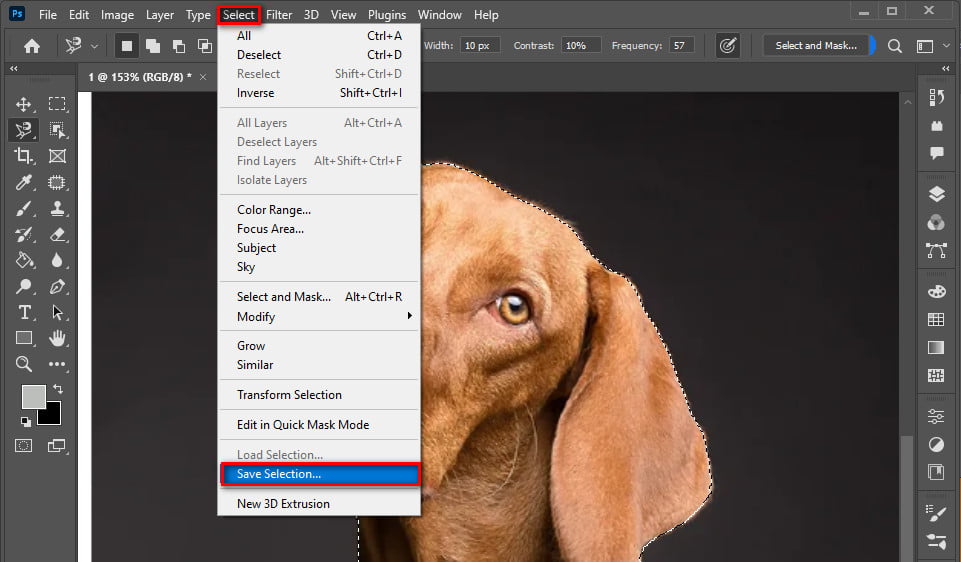
You may save your pick by heading to Selection > Save Selection and entering a name for the selection.
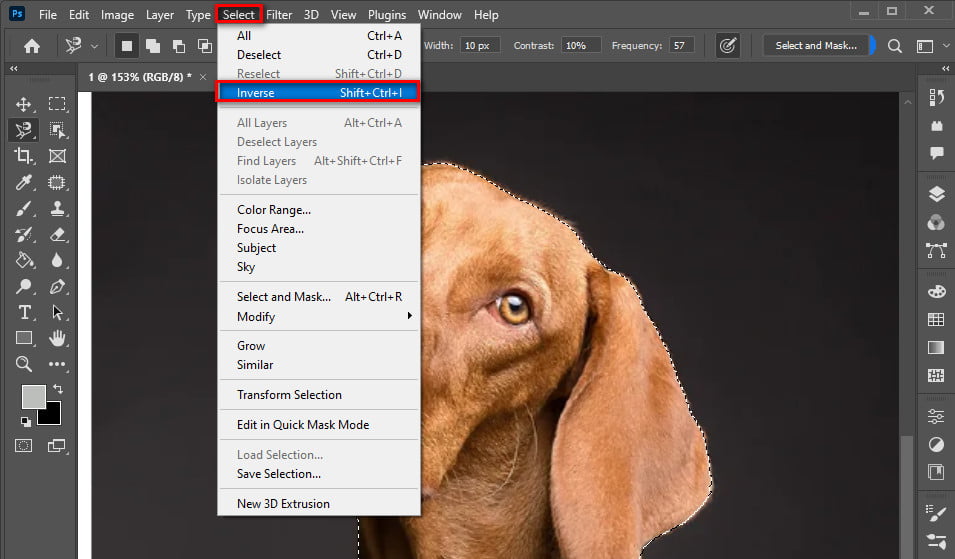
Select > Inverse the moving mouse to invert them and remove the background. Remove it by using the delete key. Instead of your previous background, you should now see a white and gray striped pattern.
Final Words
We just discussed the 6 best ways to remove backgrounds in Photoshop. As you can not deny the importance of using photoshop tools in your photographs. Use any of your preferred methods according to your needs. All of these ways are effective and professional.
