How to Edit Sunrise Photos in Photoshop

Most people take pictures of sunrises in the morning because the light during the golden hour is perfect for this. But when we see these photos in print, there is always something wrong with them.
To fix these kinds of problems, you need to know how to set your camera. But you have to be in the right place at the right time to catch a beautiful sunrise.
If you want to catch the moment when the sun first comes up, you need to find out which way east is in your location and then find a place where you can set up a series of photos before and after sunrise.
But sometimes a camera can’t take a perfect picture of a sunrise, even if it is in the right place and has enough light. What should you do in this kind of situation? You’ll be happy to hear that Photoshop has a way to fix this problem.
In this article, we will learn how to edit sunrise photos in Photoshop and add camera setting tips for sunrise photos at the end. Let’s take a look.
Steps for editing sunrise photos in Photoshop
Contents
Step 1
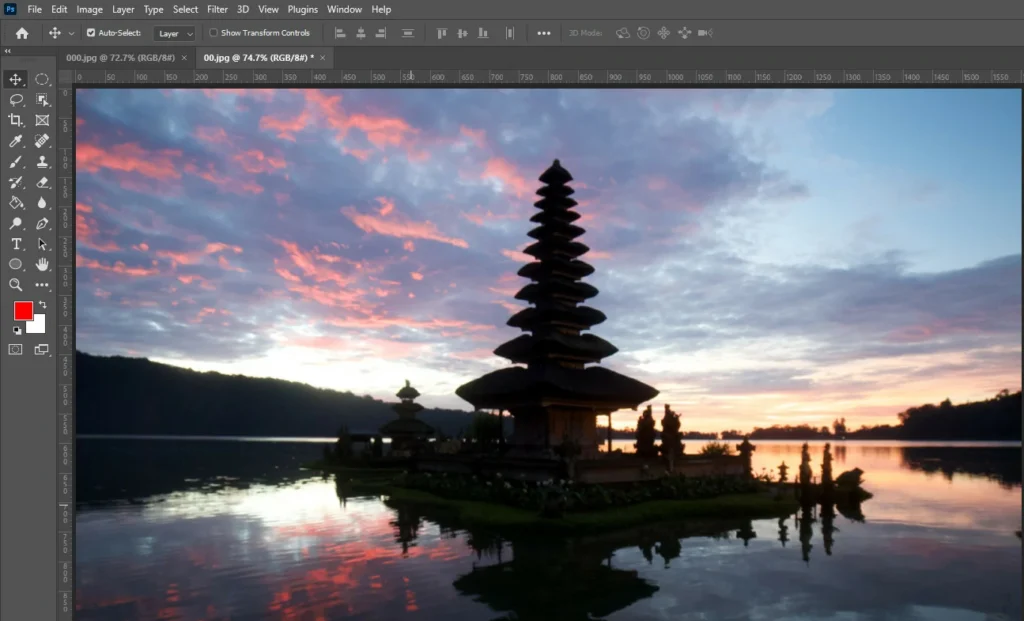
First, launch Photoshop and load the sunset photo you have chosen.
Step 2
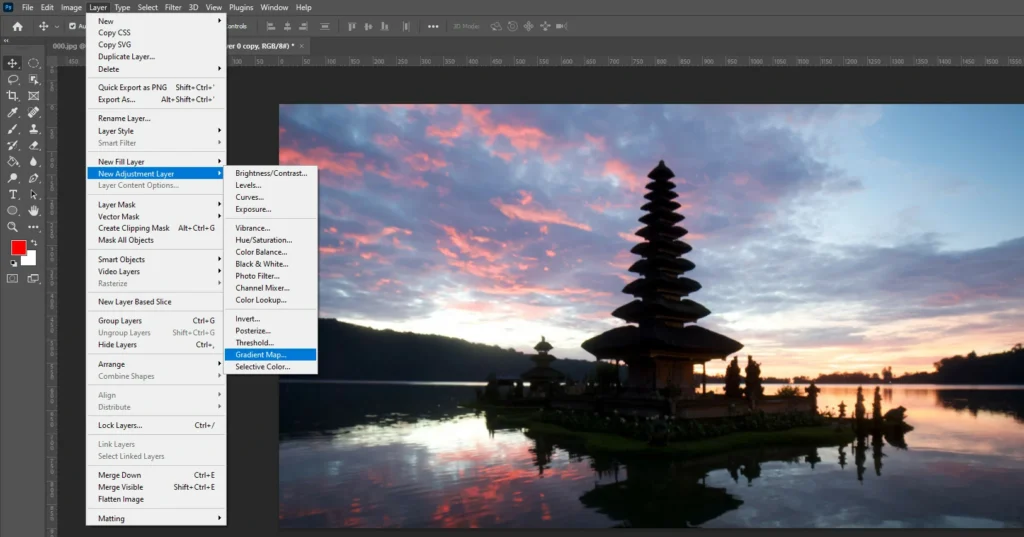
Next, select Layer > New Adjustment Layer > Gradient Map. Click OK after giving this layer the name “Colors.”
Step 3
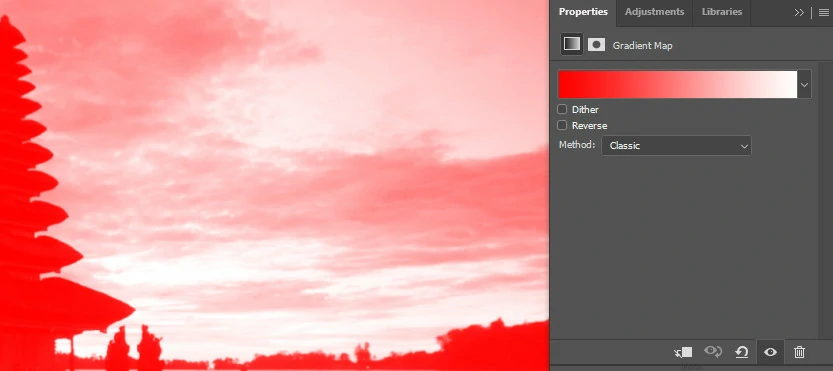
Then, select the gradient thumbnail you want to edit in the “Gradient Map’s Properties” tab.
Step 4
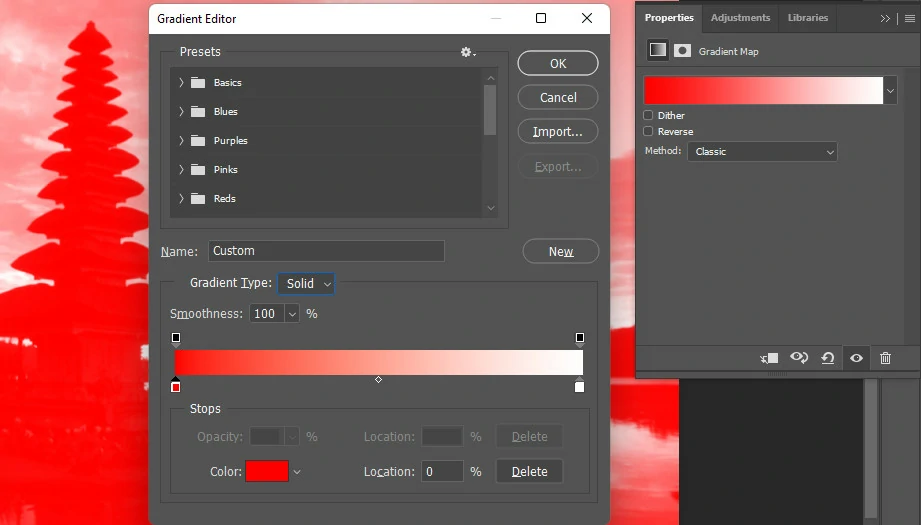
Click and hold the left color in the Gradient Editor box, and then click again to make it the primary color.
Step 5
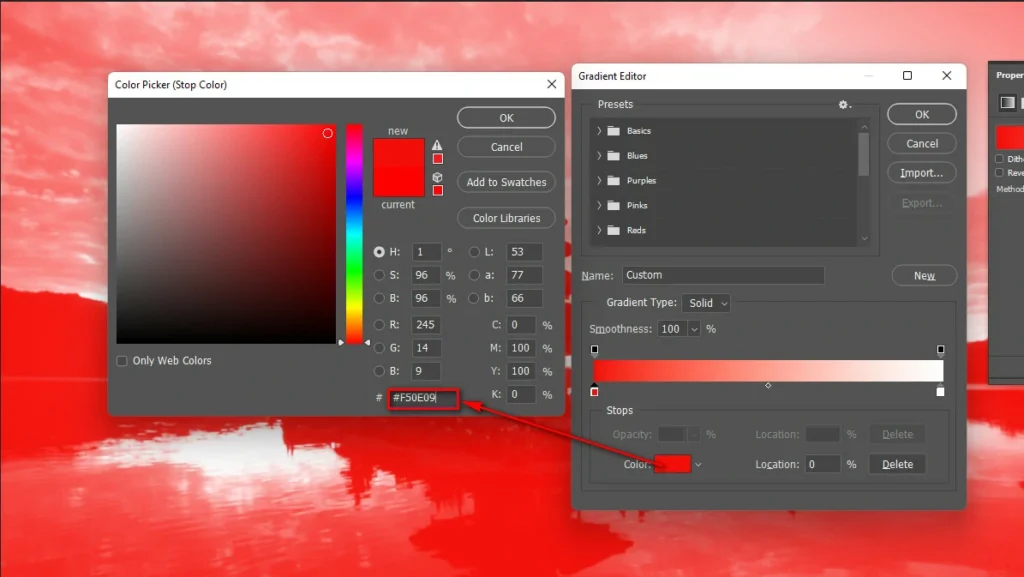
Lastly, select the color #F50E09 in the Color Picker window and click OK.
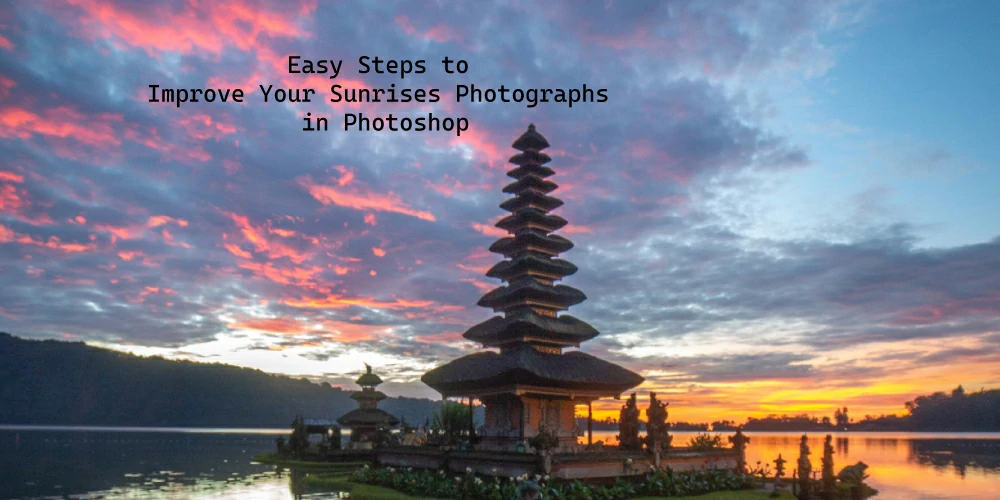
Easy Steps to Improve Your Sunrises Photographs in Photoshop
The first step is to build another level
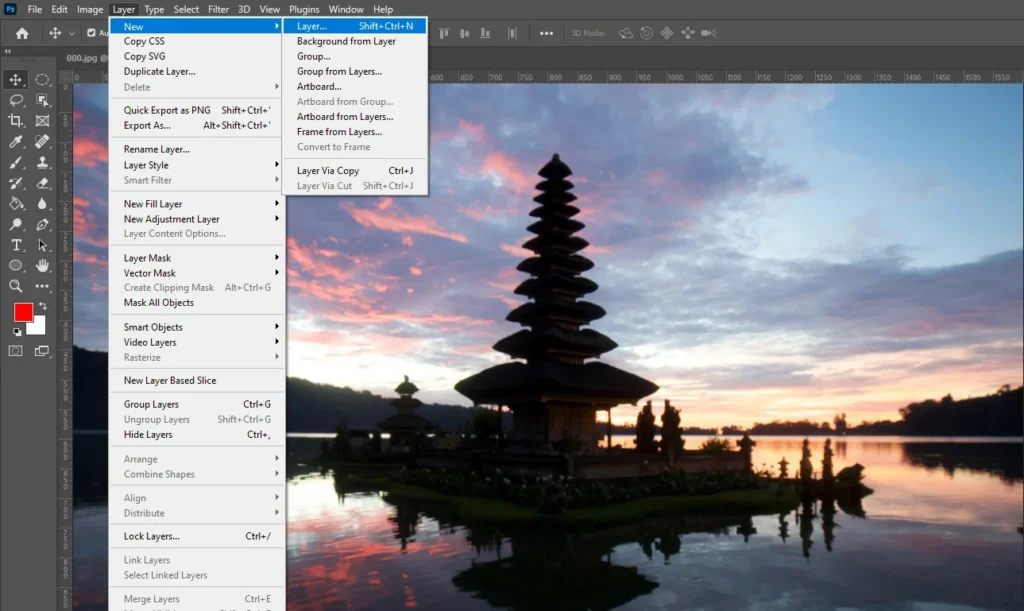
To create a new layer, we can select Layer > New > Layer or press Ctrl + Shift + N (PC) or Cmd + Shift + N (Mac).
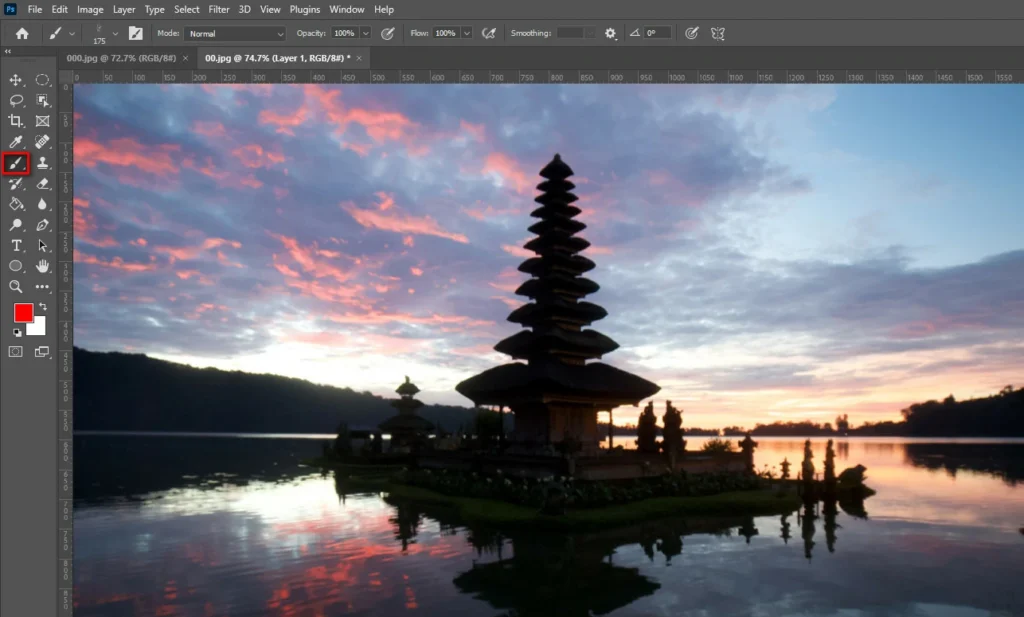
Select the Brush Tool when a New Layer has been chosen. Simply pressing the letter “B” on your keyboard will accomplish this.
Decide on the color you’ll be overlaying with
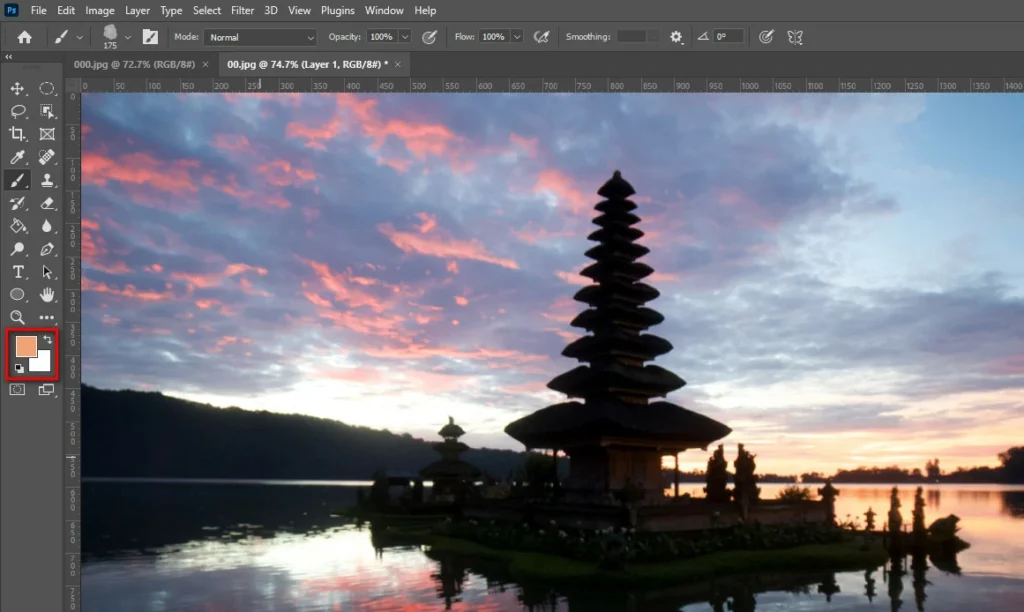
Pick a shade to use as the brush’s background. Choose a shade that will have the desired effect on the highlights. In this sense, blue is an example of a more fantastic color option. You can also go with white.
A warm color, on the other hand, will be closer to the orange end of the spectrum. Select the color you want to use in the background, and click OK.
Add more color to the painting job
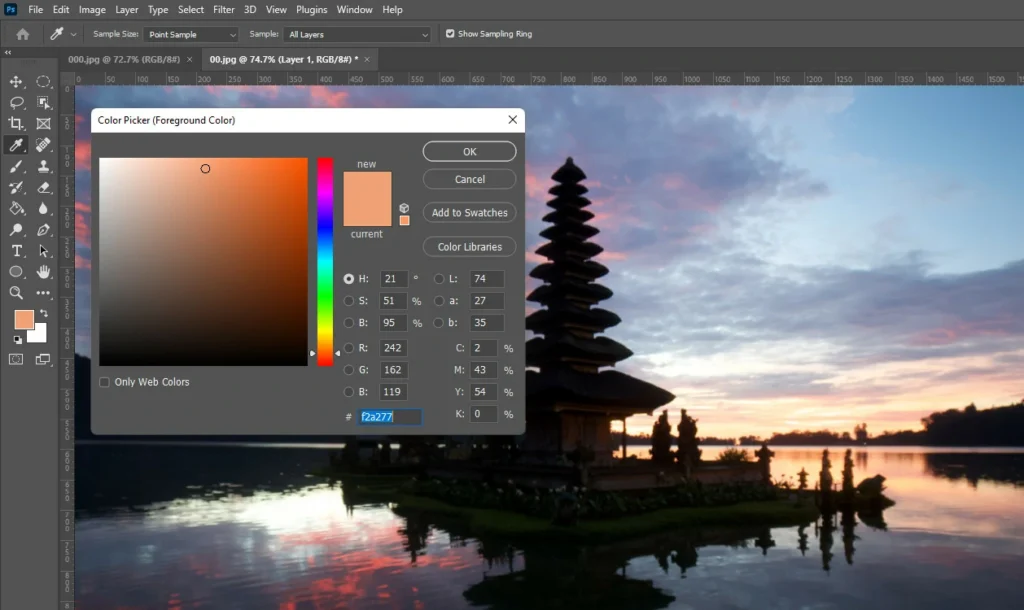
Choose a brush and a color for the background. Then paint right on the new layer. Remember to paint only in the areas that you want to stand out more.
Modify the Blending Mode
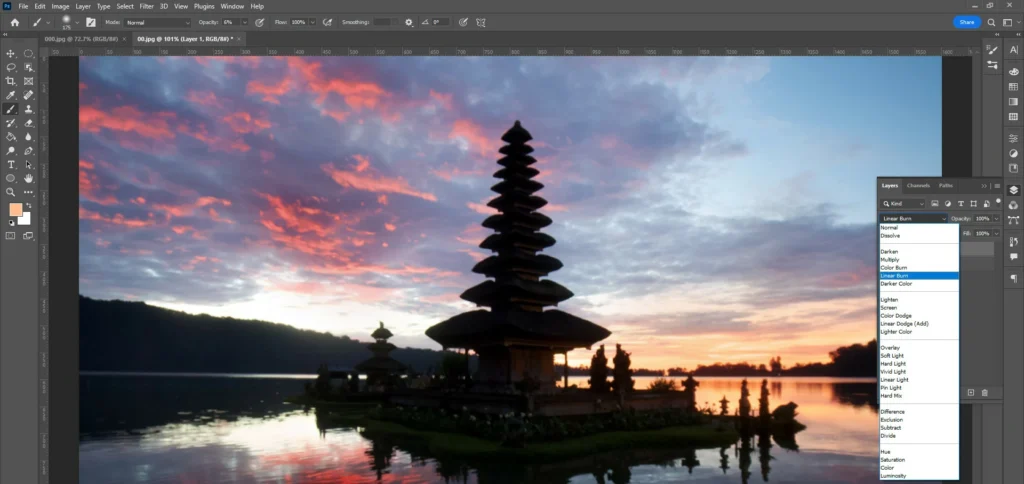
A blob of color will appear where you painted, ruining your entire work. The Blend Mode must be modified before applying this color to your image.
Let’s switch to soft light, providing a gentler illumination transition. If you need a more drastic change, try using Overlay as your Blend Mode.
Install a layer mask, and then number the layers
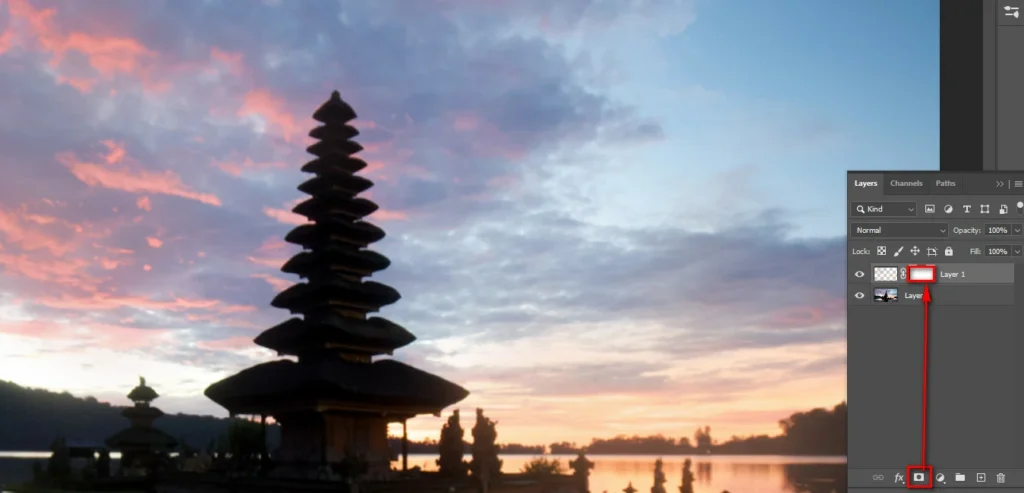
Now the blob’s hue will have permeated your photo. But we might need help if the coloring process affects parts of the map we had hoped to leave alone.
With the help of a layer mask, we can stop colors from being added that we don’t want. You can either click the Layer Mask icon or navigate to Layer>Layer Mask>Reveal All to create a new mask for the current layer.
Use the image as a mask
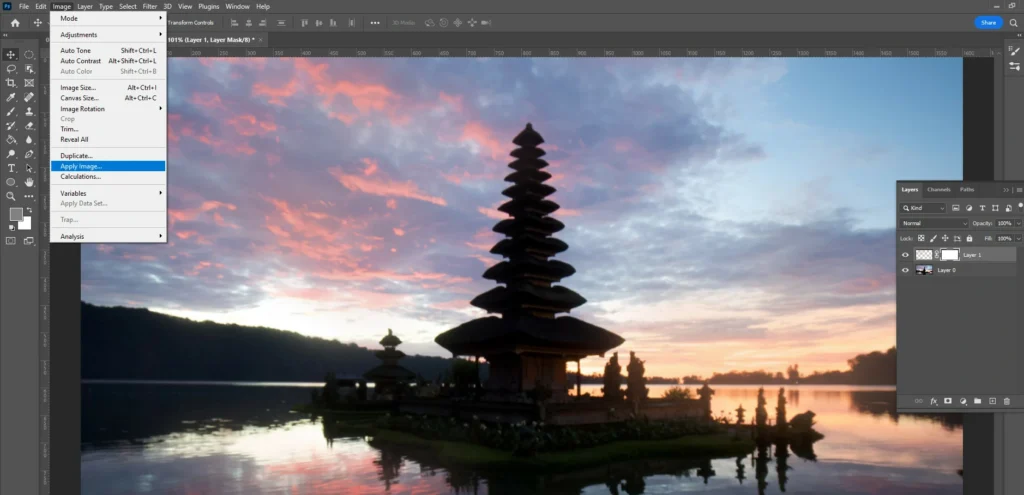
When we add new colors, we want them to have a manageable impact on the mid-tones and shadows. So we’ll be hiding them with a mask.
To hide, choose Image > Apply Image while the layer mask is selected. With this method, the color shift will be preserved in the highlights while being toned down in the shadows.
- Apply the image again to reinforce the cast removal
It’s best to do the Apply Image step to make sure that the color cast has been removed completely.
The Best Camera Settings for a Sunrise Shot
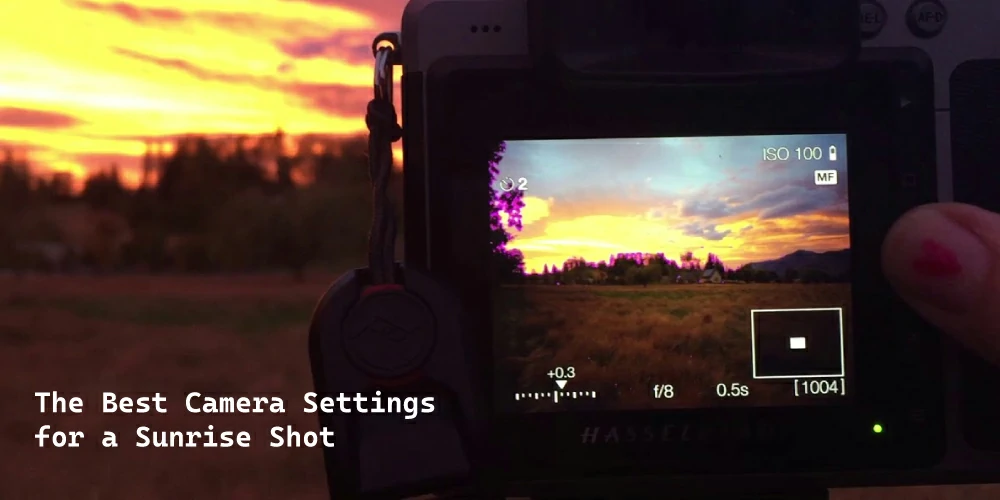
The light shifts dramatically between dawn and dusk. If you want to use fair and balanced filters, you will need to change how your camera is set up at dawn and dusk.
If you set your camera upright, you can take sunrise pictures with bright colors and many small details, including the sky and background.
We suggest you change the camera settings before moving on to the rest of the instructions. Let’s have a look at different sunrise camera settings for a different moment
Sunrise Moment
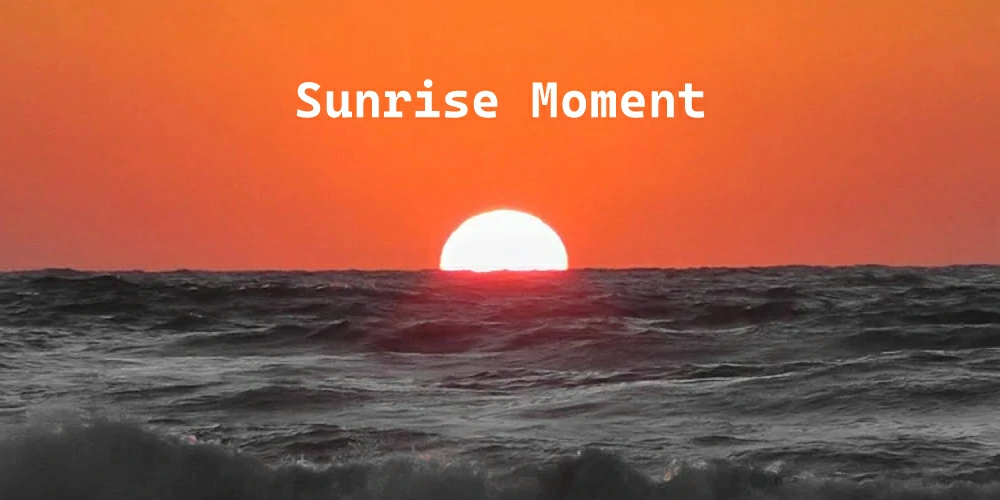
Use an ISO of 100 and a shutter speed of 1/2 to 5 seconds to get the bright effect you want. Open the aperture to f/14 or f/6.3 for a quick photo. White balance should be set manually to “shaded” or “cloudy” if you want to emphasize the warm tones.
After Dawn
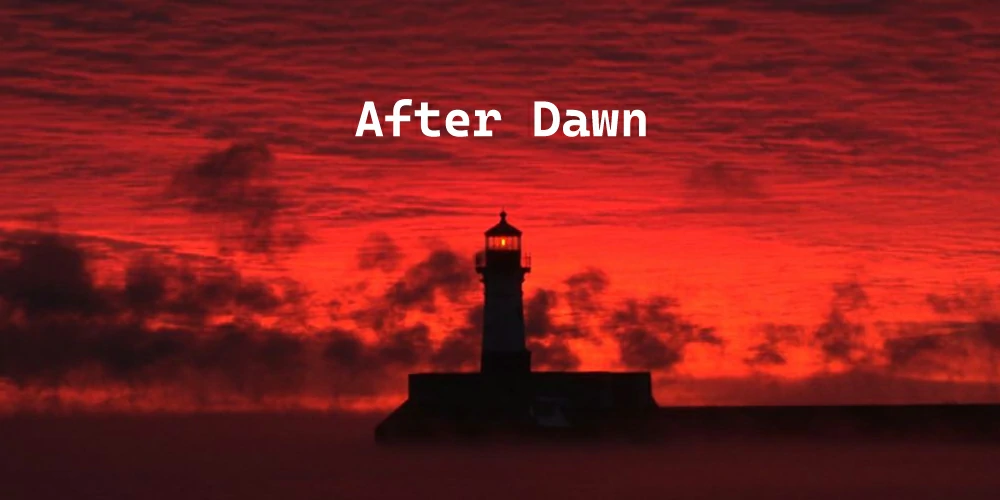
Shoot at f/11 for sharpness or f/2.8 for gorgeous bokeh blur in the light. When shooting, try to keep the ISO as low as 100 or 200 to minimize the amount of noise in the final product. It’s the same as when shooting with a smaller aperture.
If you’re using a tripod, you shouldn’t have any problems getting a fast enough shutter speed to avoid blurring, but if you’re hand-holding the camera, you’ll need a higher ISO.
Taking Better Pictures At Dawn

Find the “sweet spot” on your lens. Choose a focal length between f/6 and f/10 if you want to take a sharp sunrise photo. But most photographers say that f/2.8 is a good aperture for a pleasing amount of blur in the background.
But you can try out other settings if your photos are transparent in all directions. If your photographs are pretty bright and you want to make them dark, read this to learn more.
FAQ
How do you make a sunrise effect in Photoshop?
Start a new layer and move it so that it sits directly above the duplicate of the image that has the lighting effect applied. Use the “Paint bucket” tool to fill this layer with the color #fffec4. Put this layer into multiply mode. This method can give any picture the look of dawn.
What filter should I use for sunrise?
When photographing a sunrise, a neutral-density (ND) filter is ideal. When the sun is still creating a lot of light and your shutter speed can’t drop quite low enough for a really long exposure, these are especially beneficial for sunrises and sunsets and provide you with extended exposure options.
Bottom Line
To conclude, I hope now you can click top-notch sunrise pictures and know how to edit them with Photoshop. However, you can seek assistance from a post-production house if you encounter difficulties.


