How To Change The Color Of A Shirt In Photoshop

If you have a clothing business in eCommerce and you sell the same shirts in different colors, then knowing about Photoshop’s colorization method is essential. As we know, clothes come in different types. For this reason, editing the color of a shirt without Photoshop may appear to be a difficult task for you.
This article will show you how to change the hue of a colored shirt and a white shirt. Hopefully, this information will help you a lot. So let’s have a look at how to change the color of a shirt in Photoshop.
How To Easily Change The Color Of A Shirt In Photoshop [ A colored shirt]
Contents
It’s possible to change the color of shirts with only a few mouse clicks. This process can be done by using the Hue/Saturation Adjustment layer to switch out one color for another. When the clothing color is not duplicated in the photograph, for instance, when a model wearing a colorful shirt appears against a white backdrop, this technique works well. However, keep in mind that this procedure may only be used on colored clothing and will not work on white or black items.
Let’s look at the steps of running the color-changing method:
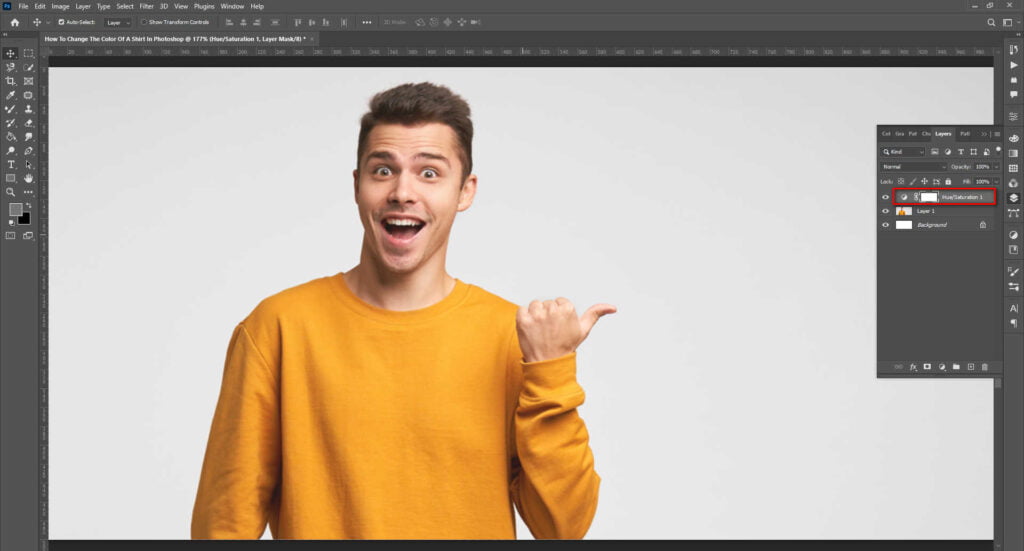
Step 1: First of all, open Photoshop on your computer and load the chosen shirt picture. The shirt’s color should not be duplicated. Next, create a new layer and name this Hue/Saturation Adjustment. Choose layer> New Adjustment Layer > Hue/Saturation from the main menu, or use the Hue/Saturation indicator to insert this layer.
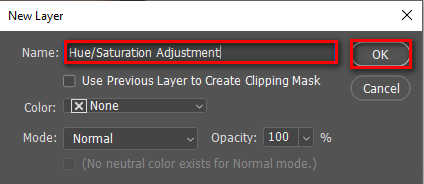
Step 2: Next, by using the appropriate menu option, give the newly created layer a name before placing it in your Layers panel. When you are done, give the layer a name, and click the OK button.
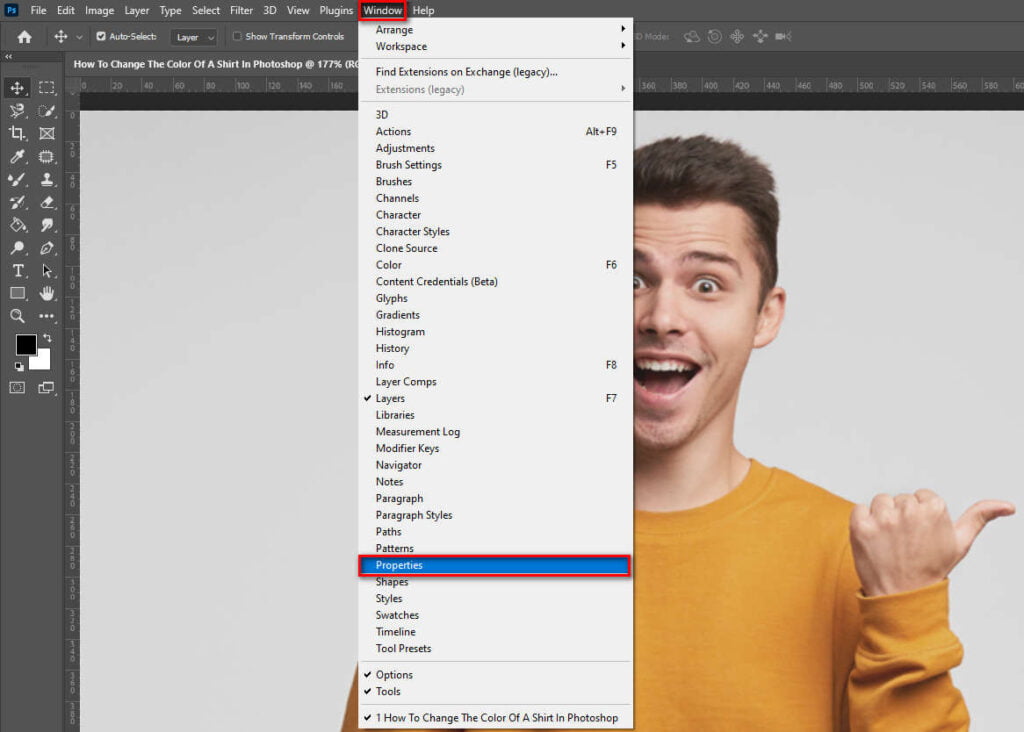
Step 3: After that, open the properties window from the layers panel. Access it by selecting Window > Properties if it is hidden.
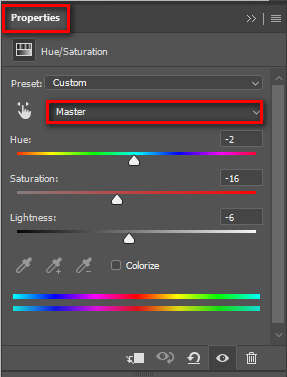
Step 4: The shade and saturation of a color can be adjusted in the corresponding panel. Choose the desired color channel by choosing the “Master” default drop-down box.
Step 5: Alternately, you can click on the image and select the color you like. You can skip the color selection step if there is already a selection around the piece of clothing.
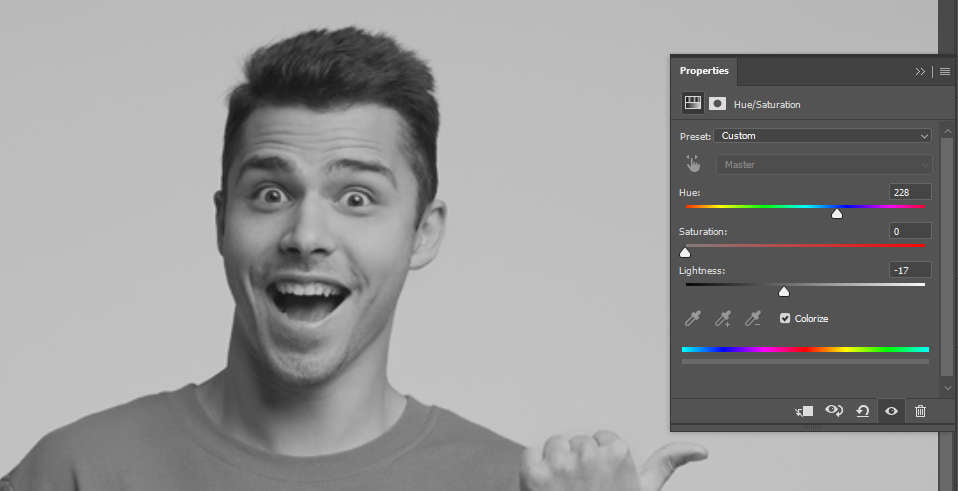
Step 6: After selecting the shirt color, you may adjust the sliders for hue, saturation, and brightness to get the specific color you want.
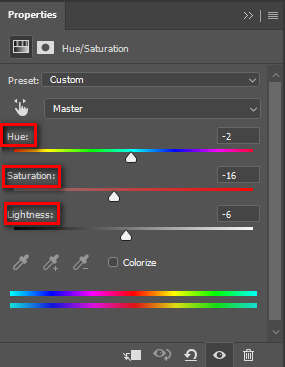
Step 7: When you change the hue and saturation, the color of the shirt will instantly reflect your adjustments. As a result, the shirt will be the color you want.

Changing The Color Of A White Shirt With Photoshop
Coloring a white shirt is a little more complicated. However, layer blend modes in Photoshop make it simple to incorporate a color fill layer into a white background.
This method requires fundamental selection skills to guarantee that the colored fill layer is only applied to the chosen clothing. This procedure is simplified using a tool such as an Object Selection Tool or the Quick Selection Tool.
Let’s apply the method:
Step 1: Open the white shirt picture in Photoshop again, this time focusing on the white piece of clothing you want to alter.
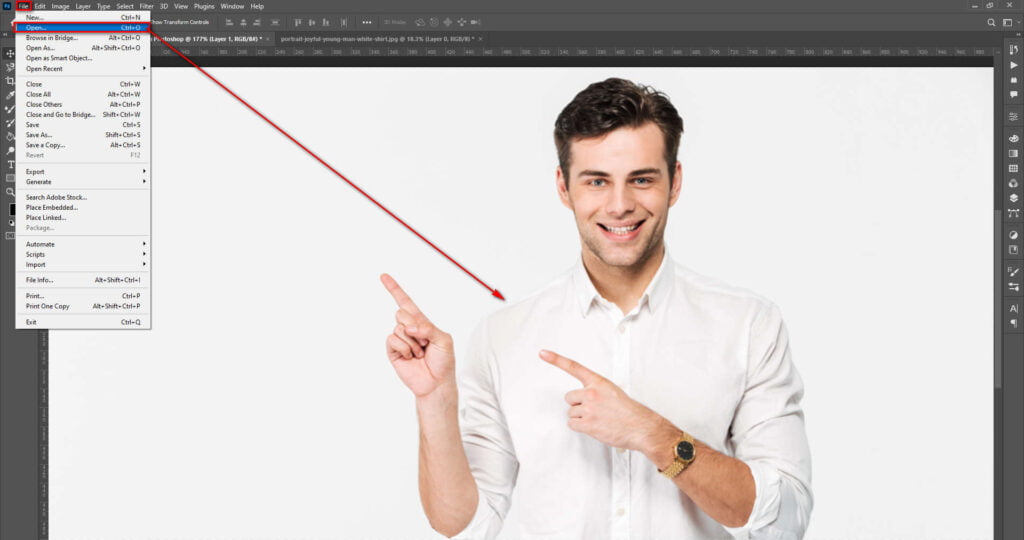
Step 2: Choose the white shirt by using a suitable selection tool. The Object Selection feature is the most helpful at the moment. To use it, press the letter W on your keyboard or choose it from the toolbar. Holding the symbol will bring up a menu where you may select a different selecting tool.
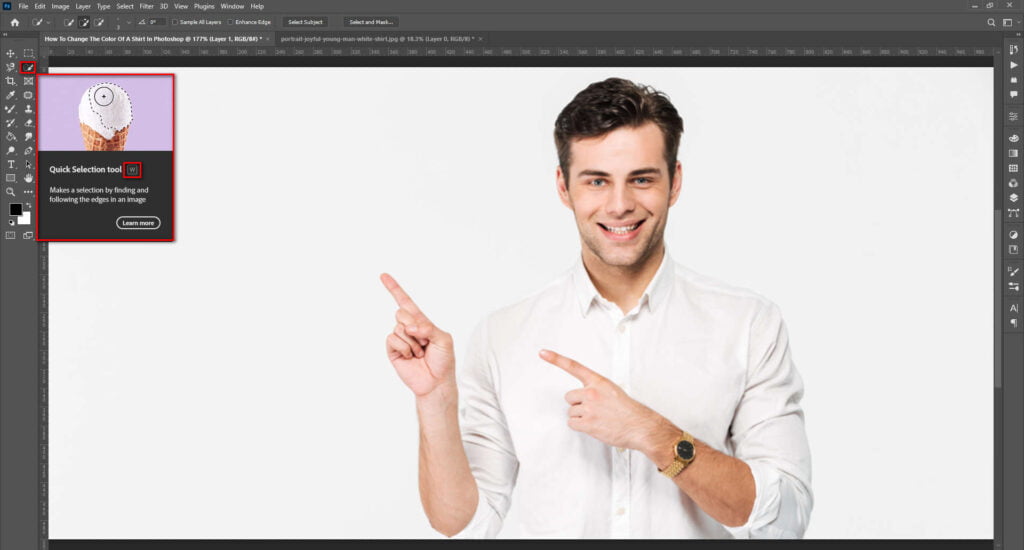
You may pick out the shirt by clicking and dragging the Object Selection tool over the picture to create a selection box. Photoshop will automatically adjust the pick to fit the border of the shirt. Use the fast selection tool instead of painting over the shirt until it is completely chosen.
Step 3: Select “Add to Selection” from the Options menu, which may be opened from any selection tool. Before continuing, ensure that the entire shirt has been selected.

Step 4: Once the shirt has been chosen, a new fill or adjustment layer can be added by clicking the appropriate icon at the bottom of the Layers panel and then choosing Solid Color from the drop-down box.
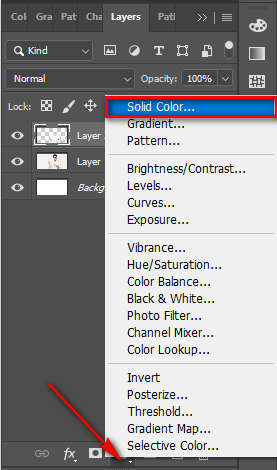
The color selector window will pop up so you can choose the exact shade of shirt you want. Select a color from the panel on the left, or enter a hex or RGB value in the color modes on the right. The brightness of the color may also be modified using the central slider.
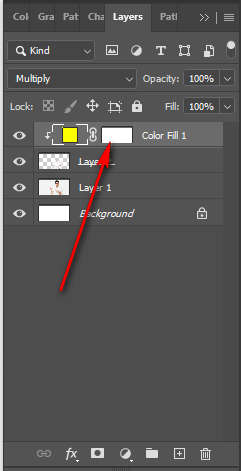
Step 5: After clicking OK in the color picker, you’ll see that the white clothing has taken on a new color. To change the current color, choose the new fill layer you created, then go to the Layers panel’s top and click on the blending mode drop-down menu. Finally, choose Multiply from the selection that appears.

After choosing Multiply, the new color will mix in with the clothing and seem much more natural. However, depending on how meticulously the shirts were selected, there may be some spots on the shirts that are still white.
The layer mask makes it easy to refine these regions. You may make the necessary adjustments by choosing the Brush tool from the toolbar and then clicking on the layer mask of the fill layer. In this method, make sure white is the background color and black is the foreground.
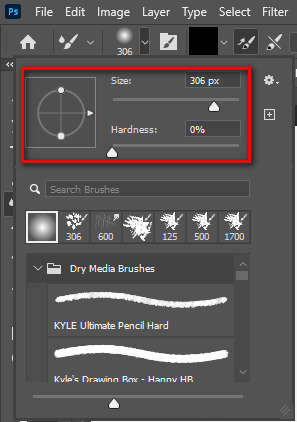
Step 6: Adjust the brush size by dragging the slider in the Brush Preset Panel or pressing to lower the size or increase the size. You may customize the brush’s size to fit any area that needs touching up. When the brush size is correct, brush it over the picture to fix it.
Step 7: Once you’re done using the layer mask and the Brush tool to make the necessary adjustments, you’ll have a shirt in whatever color you choose instead of the default white.
Photoshop’s Multi-Color Shirt Saving Tutorial
If you want to create and store several copies of a shirt, duplicating it is the solution. A shirt would require a duplicate layer if its color was changed. After you’ve copied the layer, change the color of the shirt and save it back to the original file. Then repeat the process to create several different Shirts with the same design.
You may know that Photoshop only displays the currently selected layer. To show or hide the picture layer, click the eye symbol button. Moving the colorful shirt to the top of the Photoshop window is another way to make it stand out.
See some Tips Before Changing the Color of a Shirt
There are certain factors to keep in mind while changing a shirt color. Such as:
Attempt a Unique Mixing Technique
In order to achieve the desired effect, you may need to try out several different blending modes. One way to get the required hue is through repeated layering. Additionally, Photoshop’s fill color function is also good. This would allow any other user to paste the full unmasked color over your masked area.
The Art of the Perfect Mask
A well-crafted selection is the foundation of a fantastic color mask. Unfortunately, when the selection is compromised, the color-changing effects may spread to other image sections.
As a result, the lasso tool’s ability to make masks is quite helpful. If you successfully mask a portion of a picture in Photoshop, your adjustments will be limited to that area only.
When working with complex objects, use the photo masking service to avoid any glitches in the process.
Select Your Own Mission
After making masking, shape selection may be modified using several paintbrushes and other editing tools. For example, the soft brush tool could be handy for creating fine-tuned choices.
When the background color is black, it is considerably easier to delete particular sections. You may also make the brush’s background white to make a selection. As a result, it is recommended that the first choice should be edited in Photoshop for the best results.
Wrapping Up
Changing shirt color in Photoshop may sound critical, but in reality, colorization methods are easy if you know the actual techniques. Apply our techniques to change the color of your shirts.


