How to Retouch Skin in Photoshop [ 5 Best Techniques]

The practice of erasing all imperfections from a photograph is known as photo retouching. This includes color and tone correction, the removal of blemishes, under-eye circles, brightness, contrast, and saturation. There is a significant distinction between photo editing and retouching.
Photo editing is the process of cropping or adjusting the exposure or color temperature of photographs. On the other hand, photo retouching does an overall correction of photographs. So, if you have a photo retouching business, you can rely only on photo editing. Photo retouching is a must-have for you.
But if you do not know how to retouch skin in Photoshop, we are here to help you out with this article.
How to Retouch Skin in Photoshop: Different Ways With Steps
Contents
There are various ways of retouching skin in Photoshop. But people use a few well-known techniques. Healing brushes, patch tools, clone stamps, frequency separation, dodging, and burning are the most common methods of skin retouching. Now, have a look at these techniques step by step.
Technique 1: Healing Brush
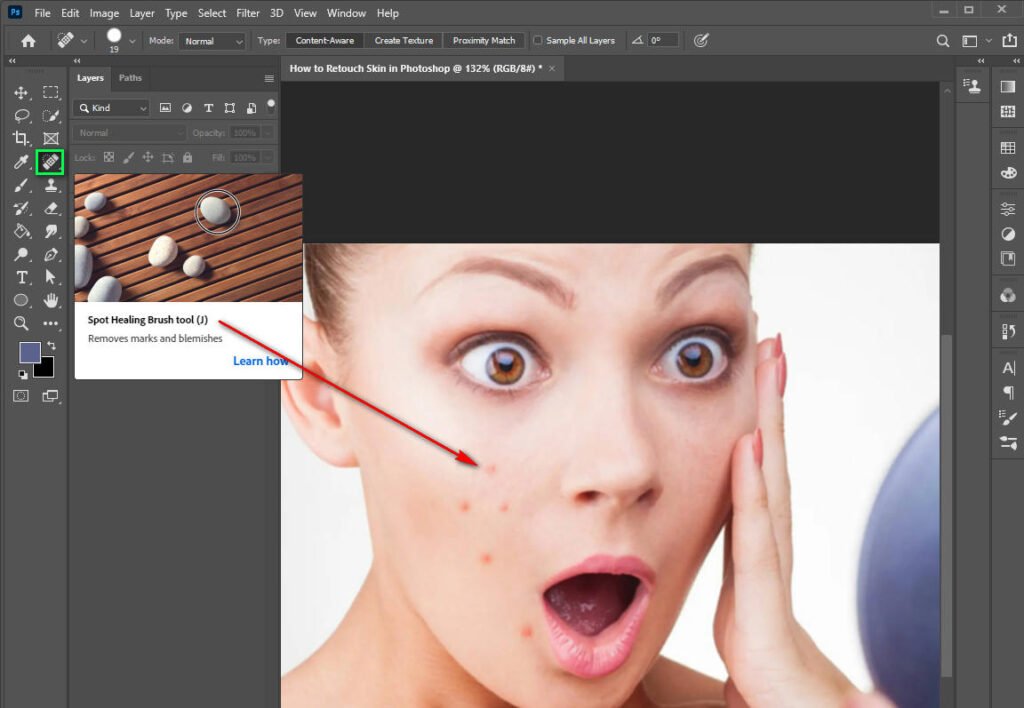
Generally, the healing brush eliminates visual imperfections such as scratches and blemishes from photographs. By selecting the surrounding region or using a predefined pattern, you may blend the flaws into the remainder of the image. On the left side of the Photoshop toolbox, you’ll find the healing brush tool.
With a healing brush, follow a few steps:
Step 1: Create A New Layer
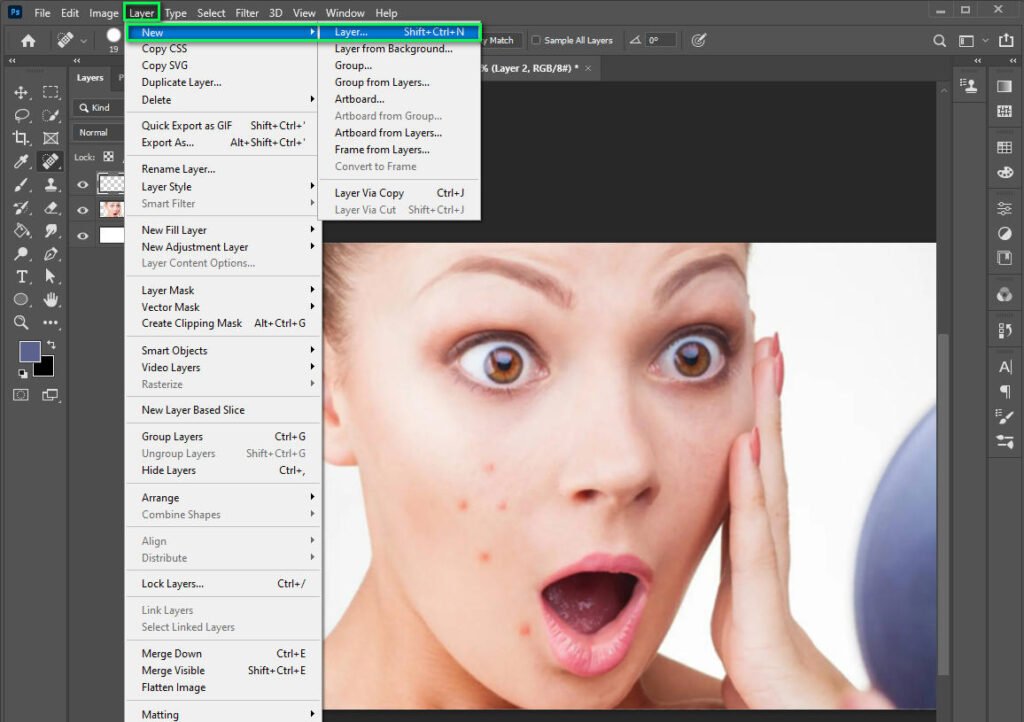
Always start with a new blank layer when using the healing brush. Because of that, you will make sure that you’re not messing with your original image and you can easily make modifications later if necessary.
For this, press the new layer button on the Layers palette or press Ctrl+Shift+n (Cmd+Shift+n Mac). Make sure the Healing Brush’s “sample” drop-down box is set to “current” and “below” when you have set up the new layer.
Step 2-Use a Small Brush
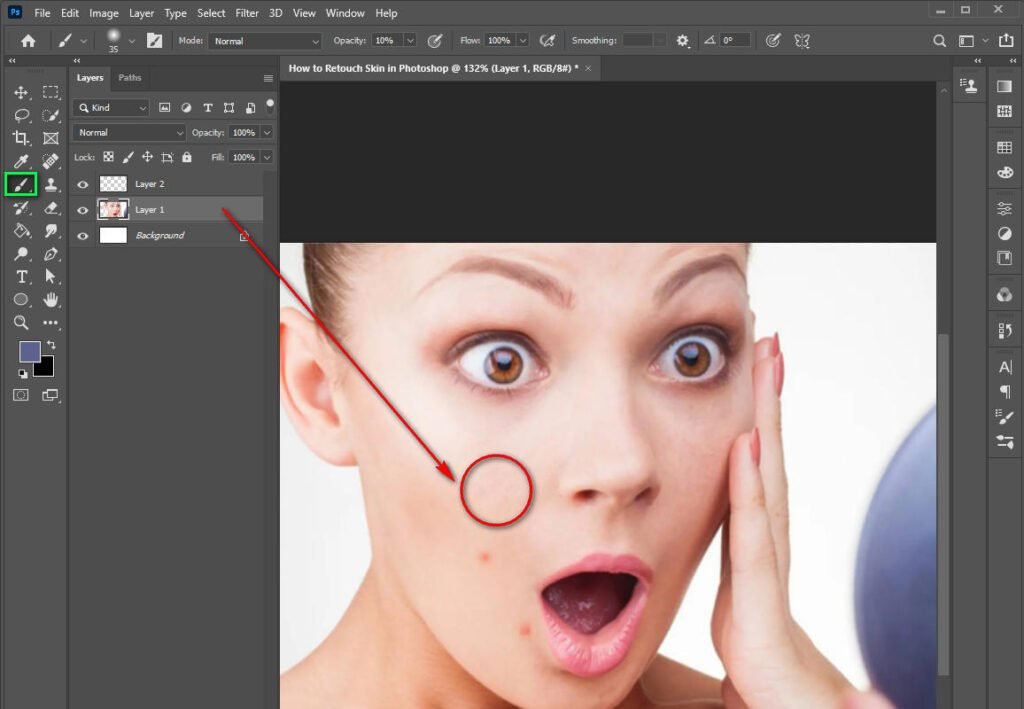
The bracket keys ({and}) can be used to swiftly modify the brush size. Make sure the brush is large enough to cover the imperfection you’re trying to get rid of.
Step 3-Make Multiple Samples
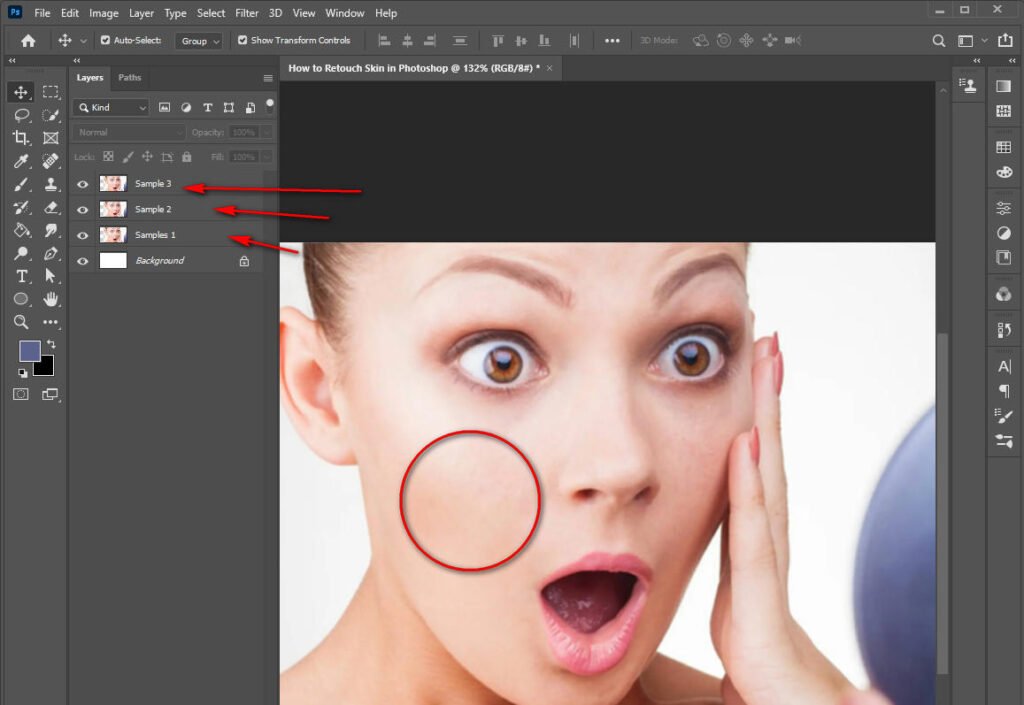
Do not make one sample, make multiple samples. If you can, do it in between each imperfection. This may appear to be a lot of work at first, but with practice, it will become easier for you. This will also modify the quality of your photographs.
Step 4- Do Zoom
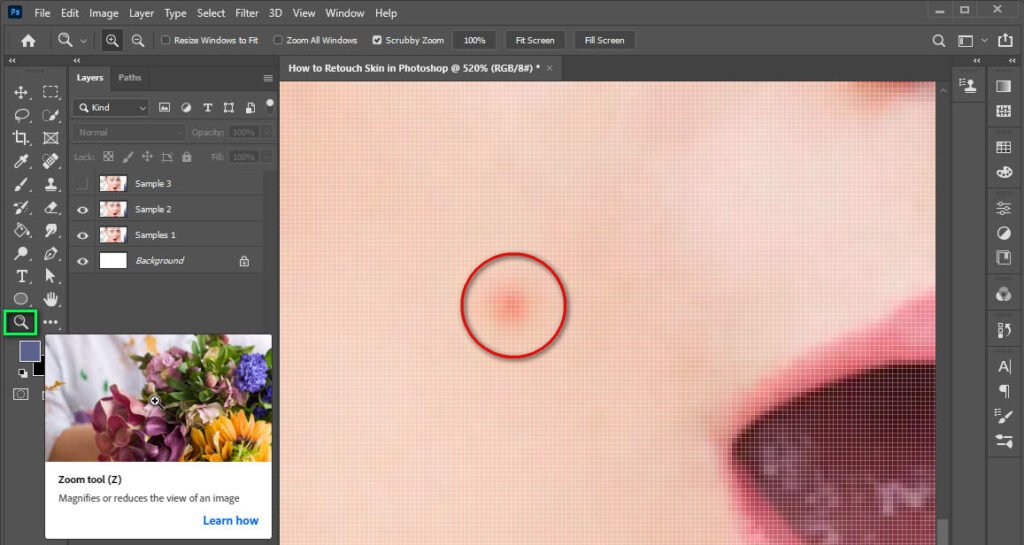
Zoom in as much as you need. Make sure you are only aiming to cure blemishes and not the skin around them.
Some photographers are hesitant to zoom in to 400 or 500% for retouching purposes, but if your subject’s skin requires it, then just do it. Though this tip is not just for the healing brush, it should be done with each of the skin retouching techniques.
Step 5- Don’t Use Paint
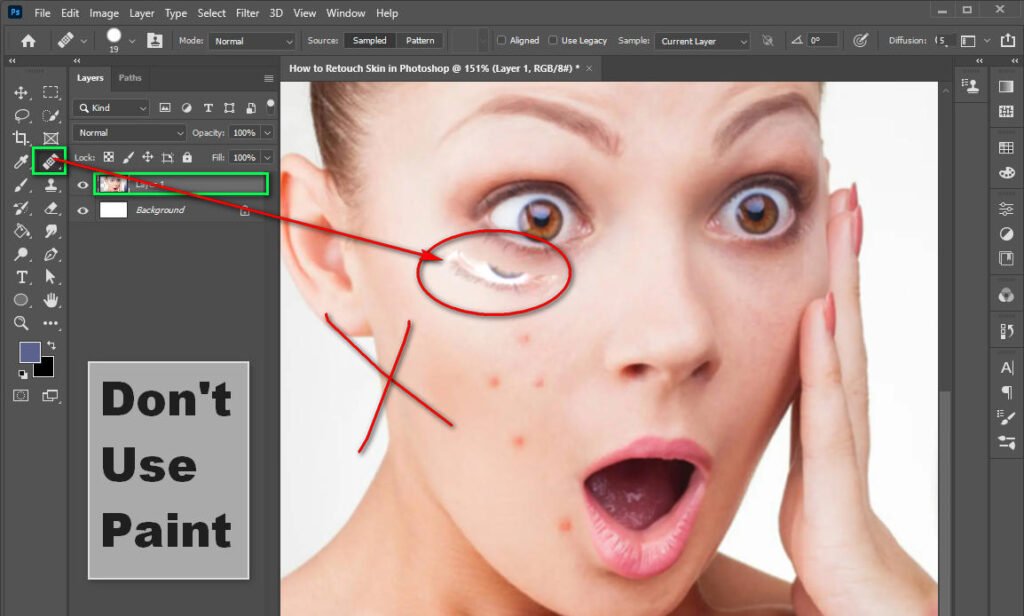
Instead of painting over the blemish with the “Healing Brush,” simply push once over it with your mouse. This will keep the changes to the surrounding skin to a minimum level.
Technique 2: Patch Tool
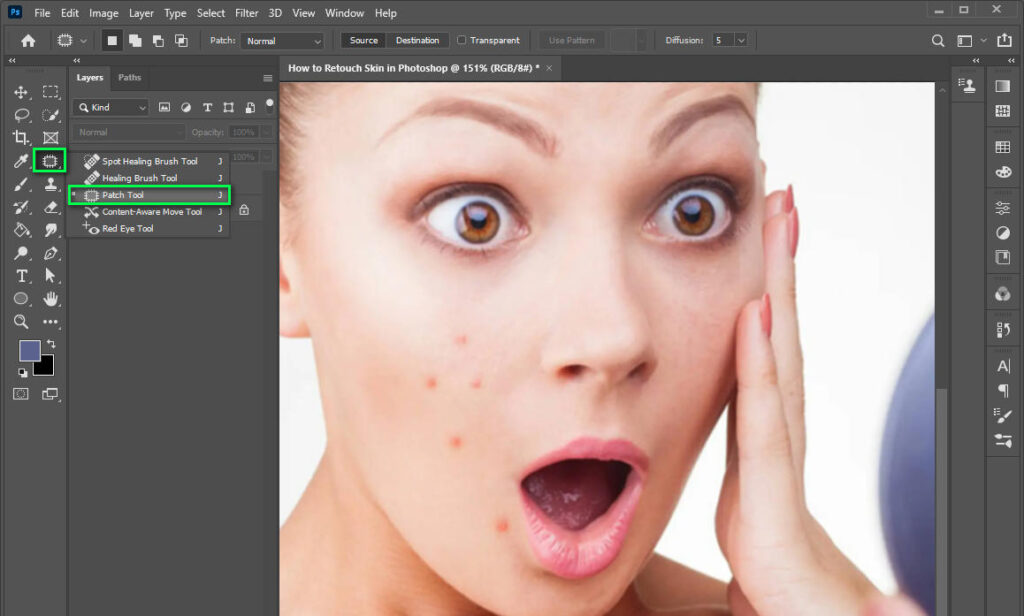
It works in the same way as the Healing Brush Tool does; it blends the texture, lighting, and shading of the selected pixels into the source area. The Patch Tool, on the other hand, uses selection-defined areas rather than a brush. Here are the steps of applying the patch tool:
Step 1- Add a New Layer
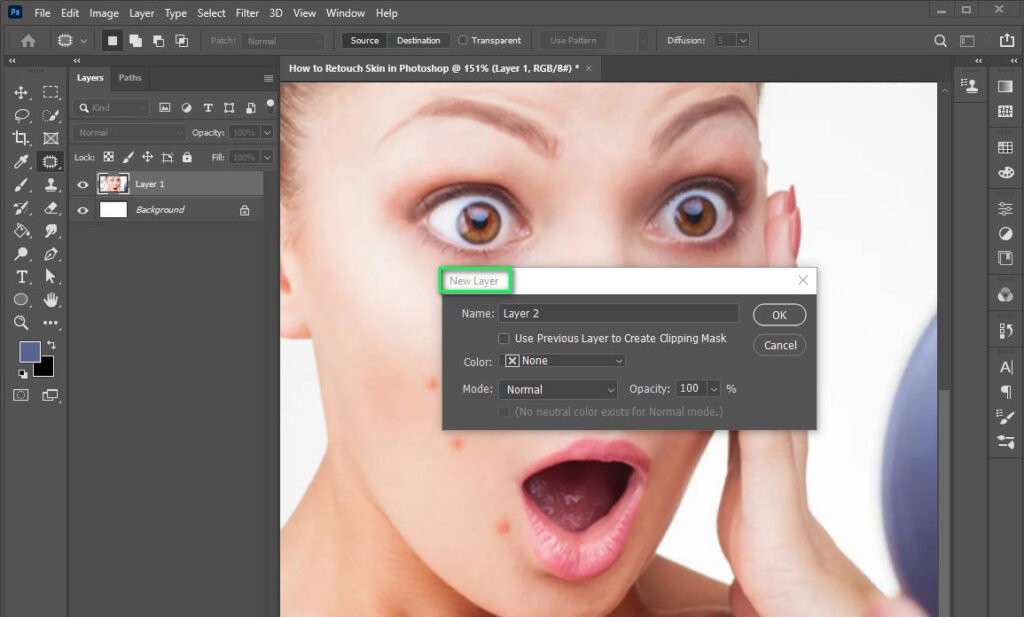
If you’ve already created and edited a few layers, press Ctrl+Alt+Shift+E (Cmd+Alt+Shift+E – Mac) to create a new layer with all of your previous changes.
This will adjust the opacity of your patch tool work if you go too far. This will make it simple to remove the layer and begin again if necessary.
Step 2- Try to Ignore Content-Aware Fill
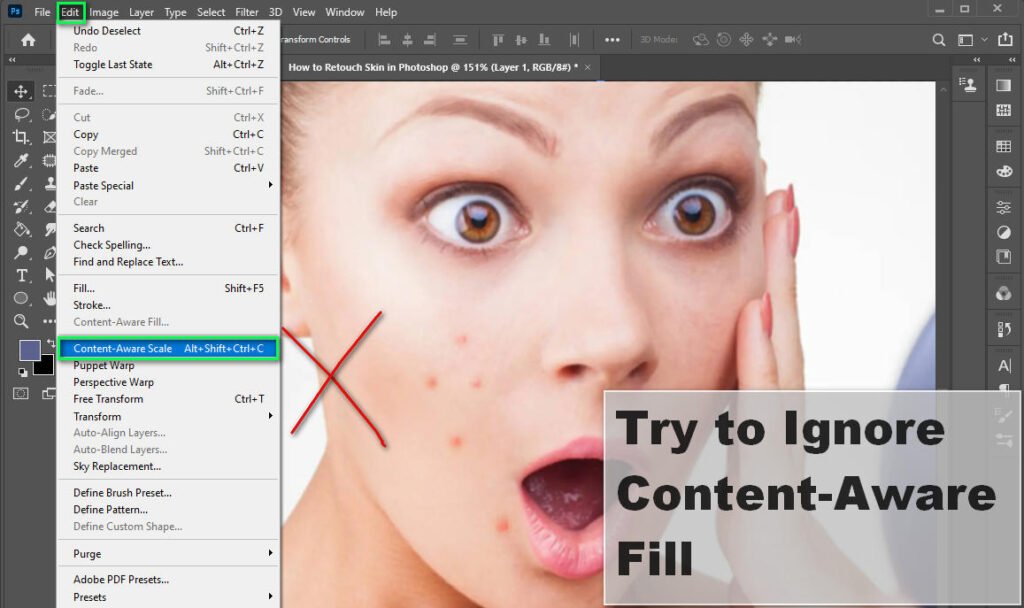
The Content-Aware Patch Tool never appears to operate properly when it comes to the retouch skin. Use content-aware fill for the background and another retouch instead of the skin retouch.
Step 3- Repair Minor Flaws
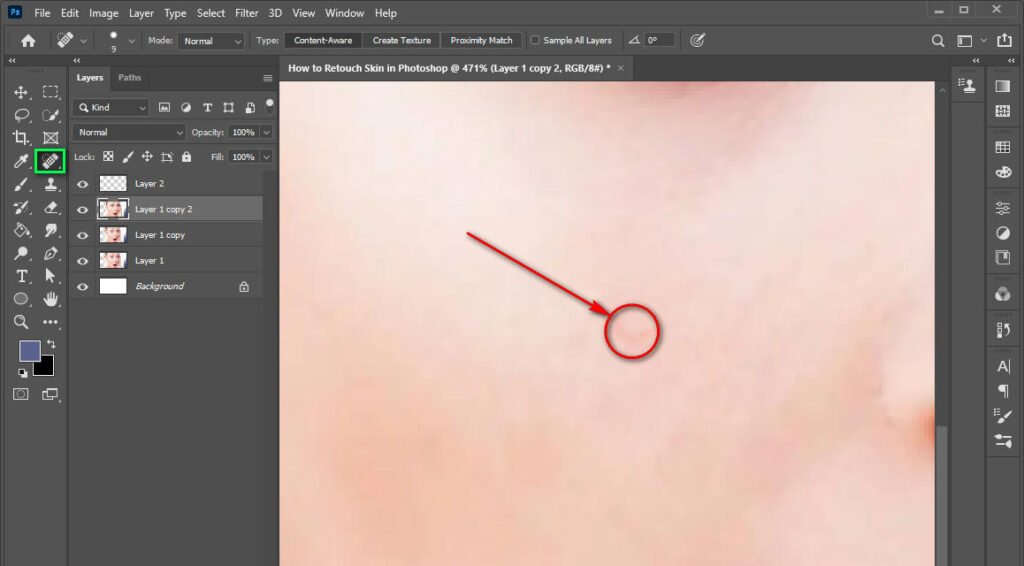
It’s quite easy to pick a large area of skin and work on it that way. But, unfortunately, this will have an impact only on several areas of the skin of any object. So, select a small area because it will allow you to control more of your skin retouching process.
Step 4- Use Tonal Sections That are Comparable
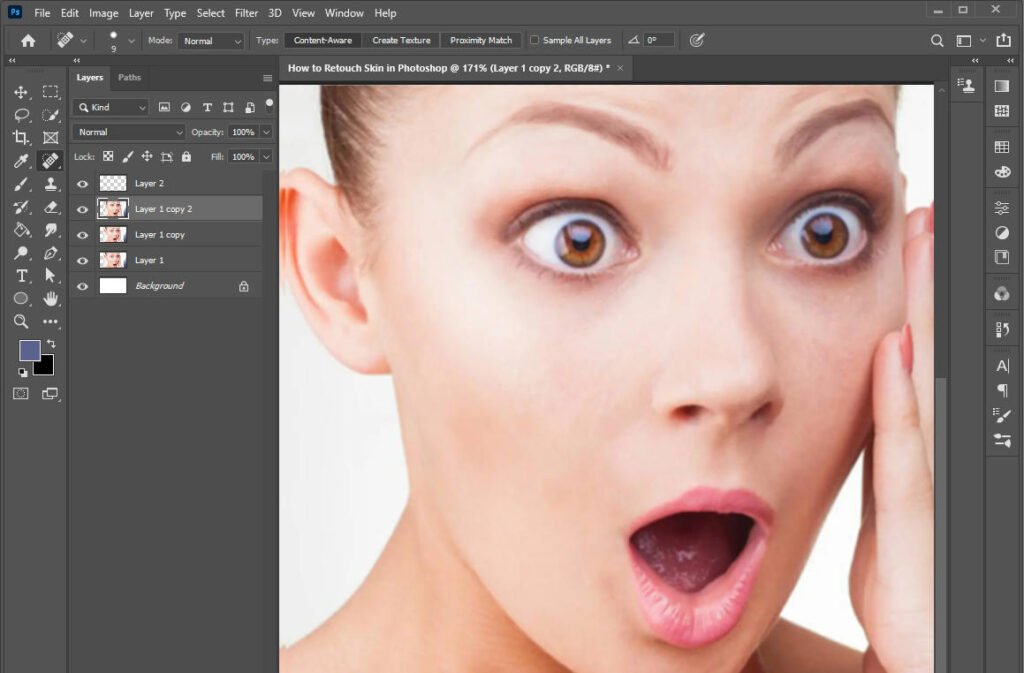
Use a sample section of your object’s skin that is similar in tone. This will decrease the probability of unwanted artifacts and blur.
Step 5- Lower the Opacity
Decrease the opacity of the surface that you are working on. Do it once you have completed the work with the patch tool. This can help to disguise a heavy hand and produce natural-looking results. This tip can be applied to almost any other skin retouching process.
Technique 3: Frequency Separation
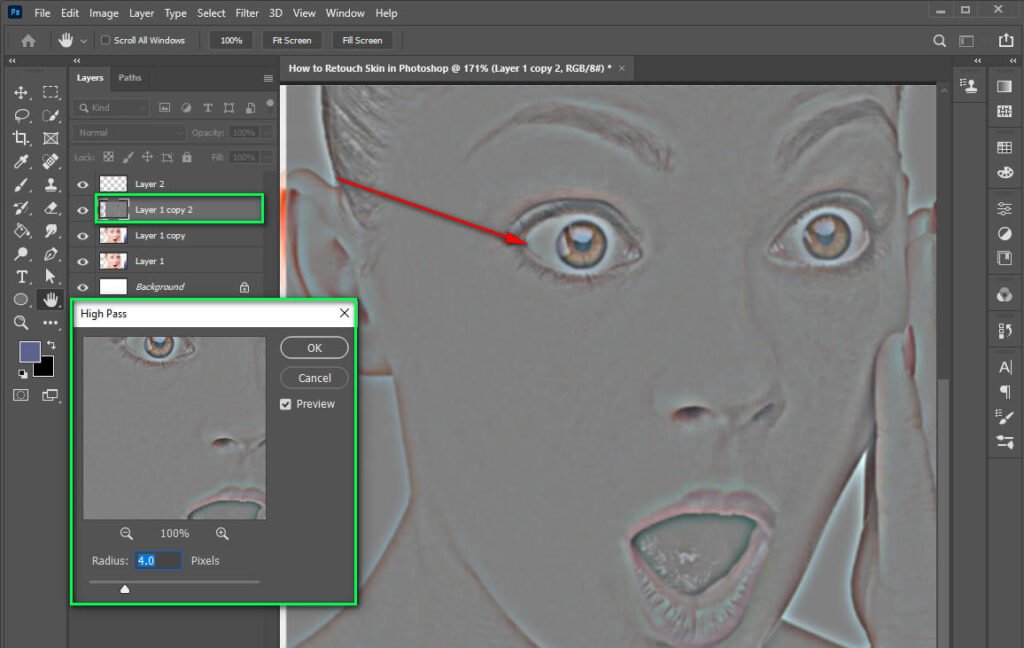
Portrait photographers utilize frequency separation while retouching. It is an effective Photoshop technique. The method separates high-and low-frequency data into layers. Hair, texture, pores, fine wrinkles, and skin flaws can be improved by frequency separation.
Let’s have a look at its steps:
Step 1- Settings for Gaussian Blur
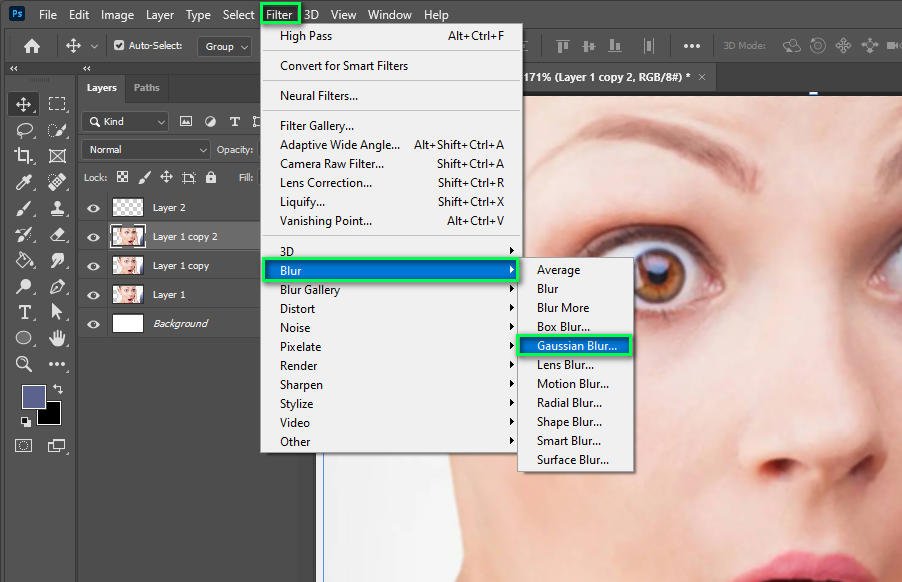
Keep the Gaussian Blur settings low. while still masking all of the details in your subject’s skin while setting up your frequency separation layers.
“4” is a fine place to start, but it will depend on the resolution you are using and how much of the frame your subject’s face takes up.
Step 2- Distort
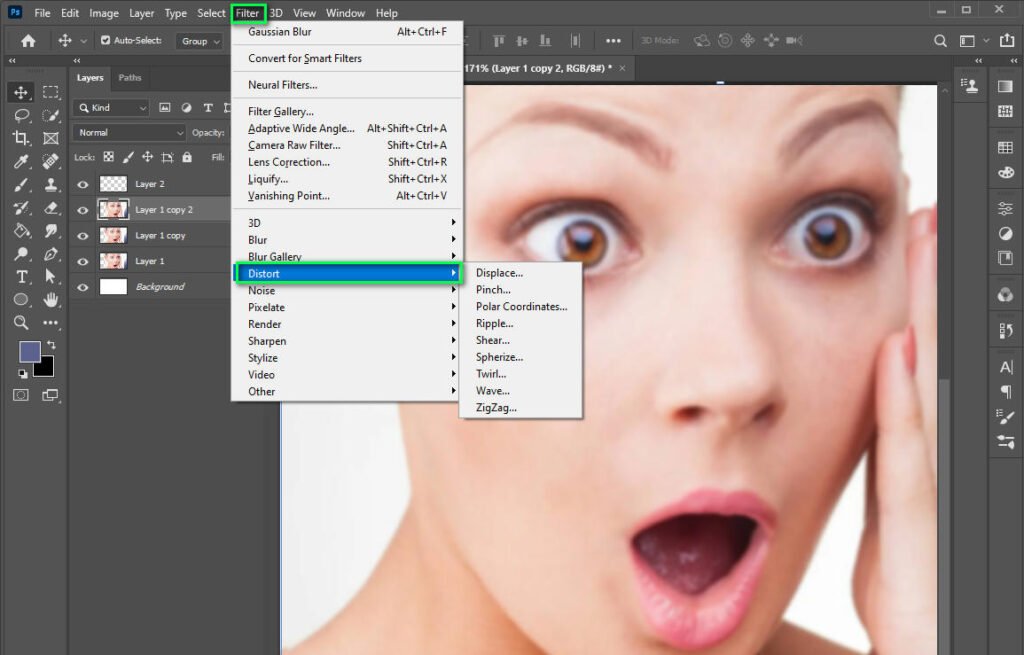
When you apply Gaussian Blur to a low-frequency layer, keep the blur constant or lower than the value you used to build the layer.
Step 3- Muddy Tone
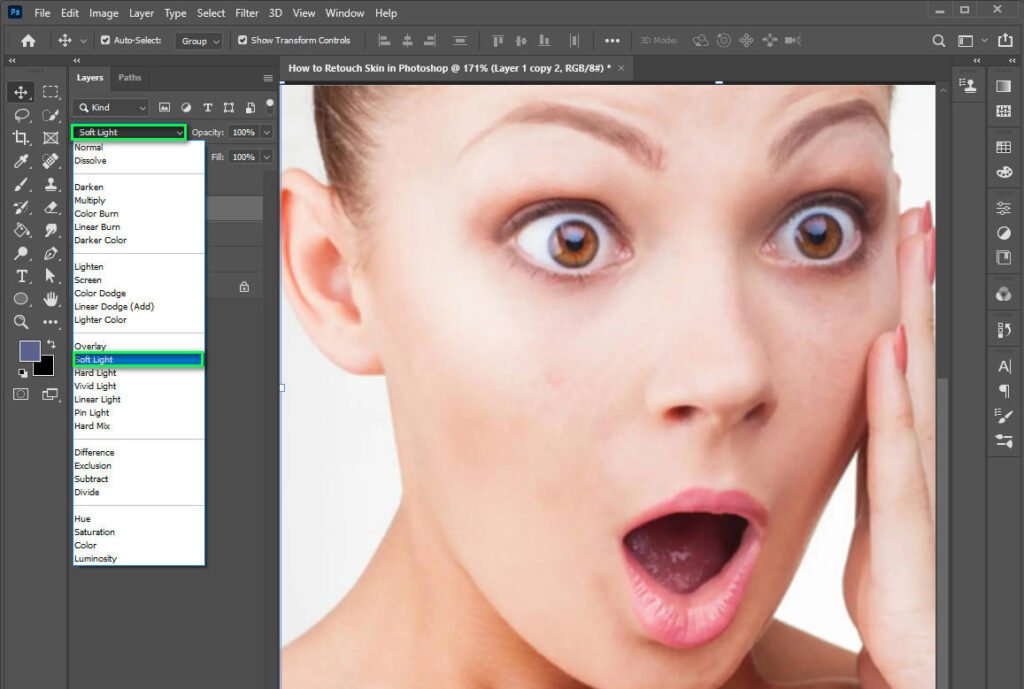
It is best to just blur the parts of skin that have the same tone. The muddy tones that arise from blurred areas in general and being highlighted are often undesirable. Avoid muddy tones by limiting your choices to areas with a similar tone.
Step 4- Do Zoom
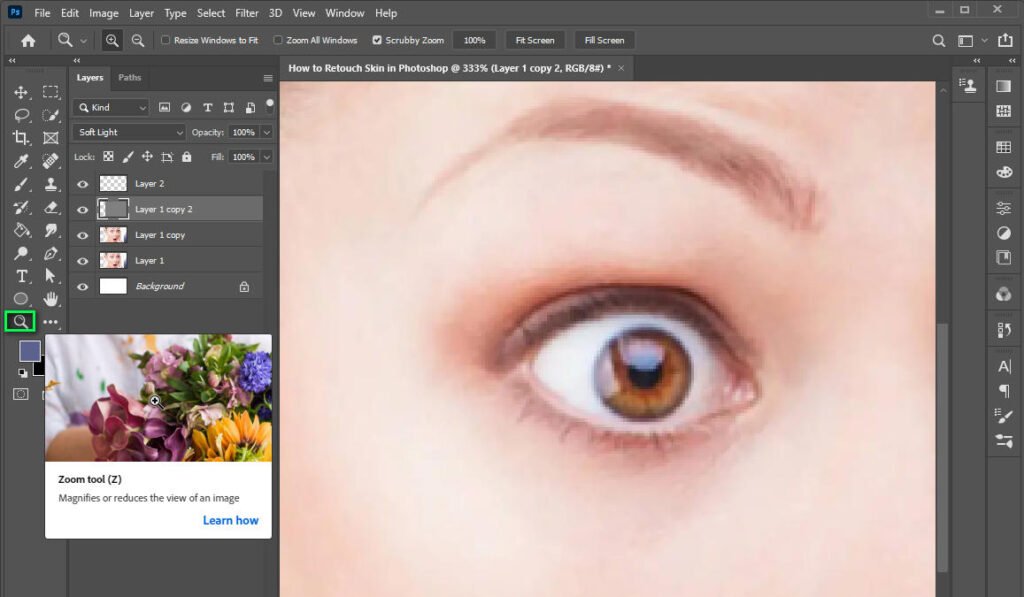
When blurring your images, make sure that you zoom in at least 100% so that you can see any hard edges that might show up.
The hard edges of your frames, like your lips and eyes, should be retouched perfectly. As soon as you see them, lower the amount of blur. It will ease your trouble.
Step 5- Clone The Stamp
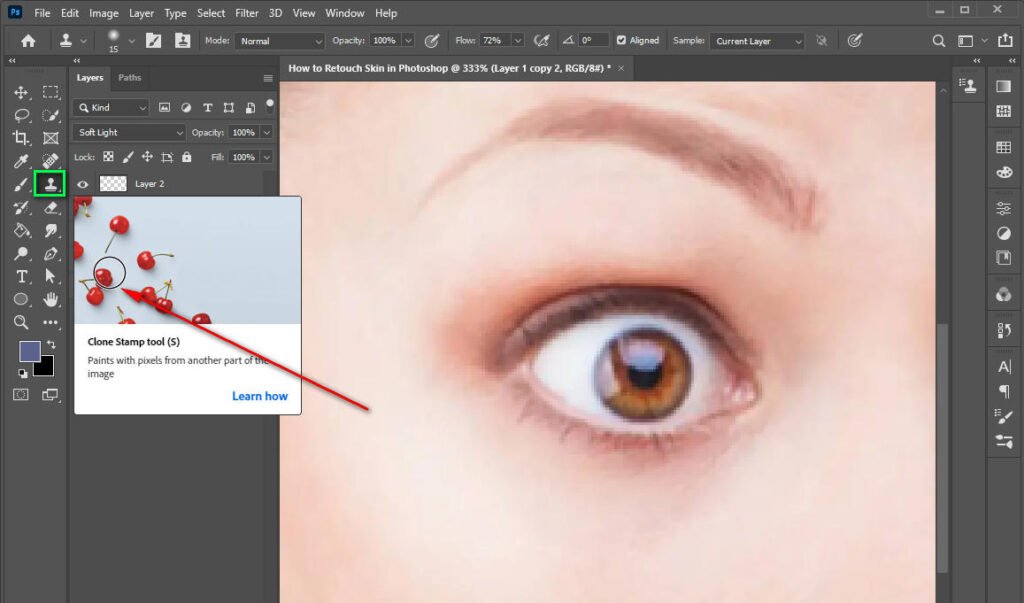
If you want to use the clone stamp on the high-frequency layer, you just have to be careful about it. The clone stamp is the finest used on small parts of the screen with one click. It ought to be fine if you have a lot of samples and you do not paint them.
Technique 4: Clone Stamp Tool
Cloning is the process of replacing a specific portion of an image with a new one using a tool that is found in a variety of graphic design applications, such as Adobe Photoshop, Illustrator, Inkscape, and GIMP.
The clone stamp tool has some steps to follow:
Step 1- Using A Soft Brush
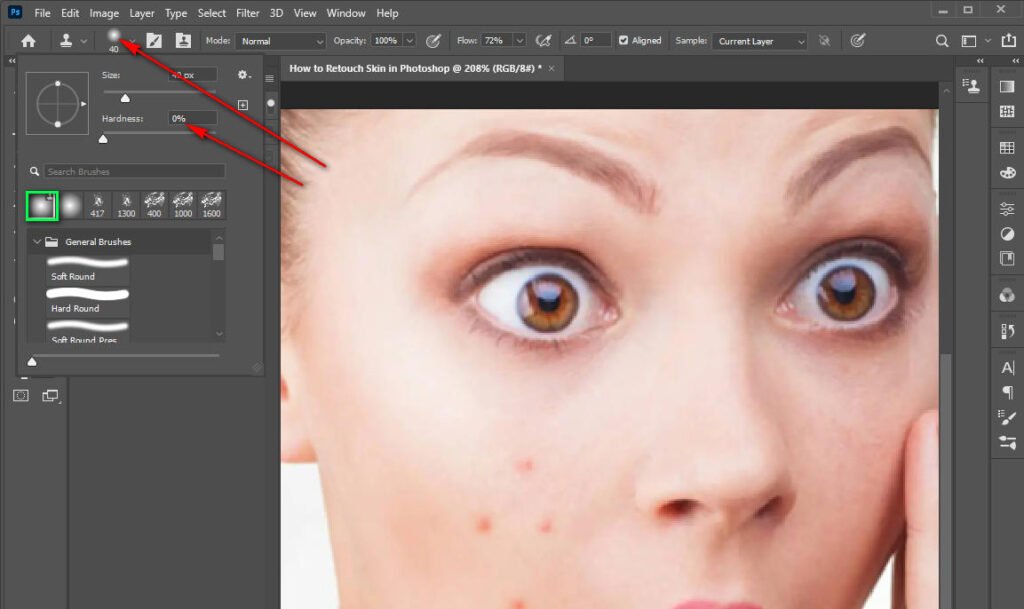
However, the Clone Stamp can make significant modifications with a single click, which may be preferred by some photographers. Use a soft-edged brush to minimize the damage to the skin around the spot you are trying to remove. Simply right-click to open the brush menu.
Step 2 – Avoid Paint
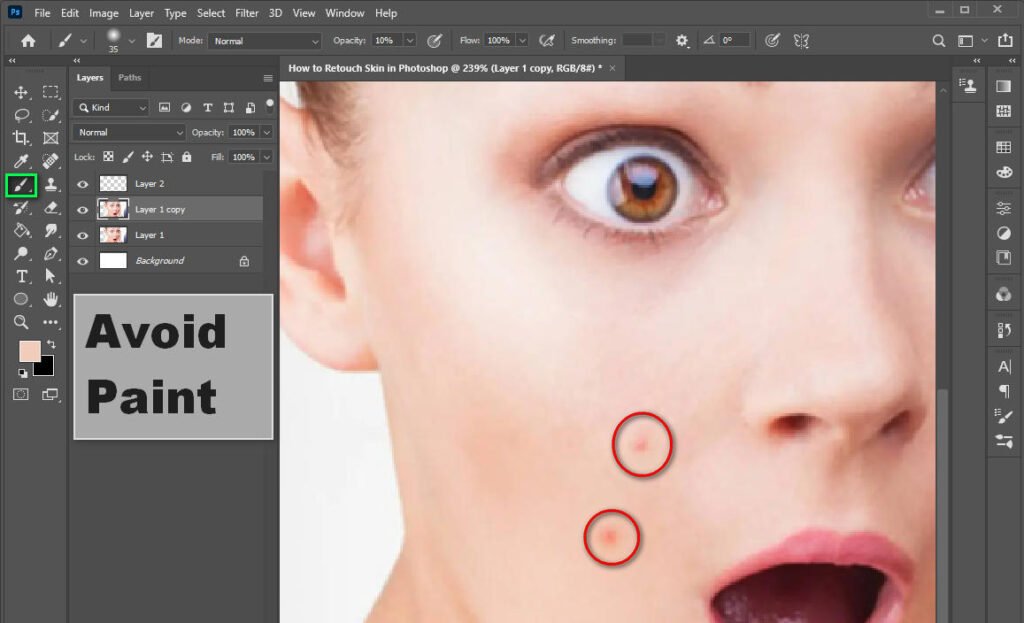
Use precautions when using the clone stamp when you are using the healing brush. Do not brush or paint over your object. By avoiding paint flaws, pores, and other marks can be fixed.
Step 3- Apply Clone In a Limited Way
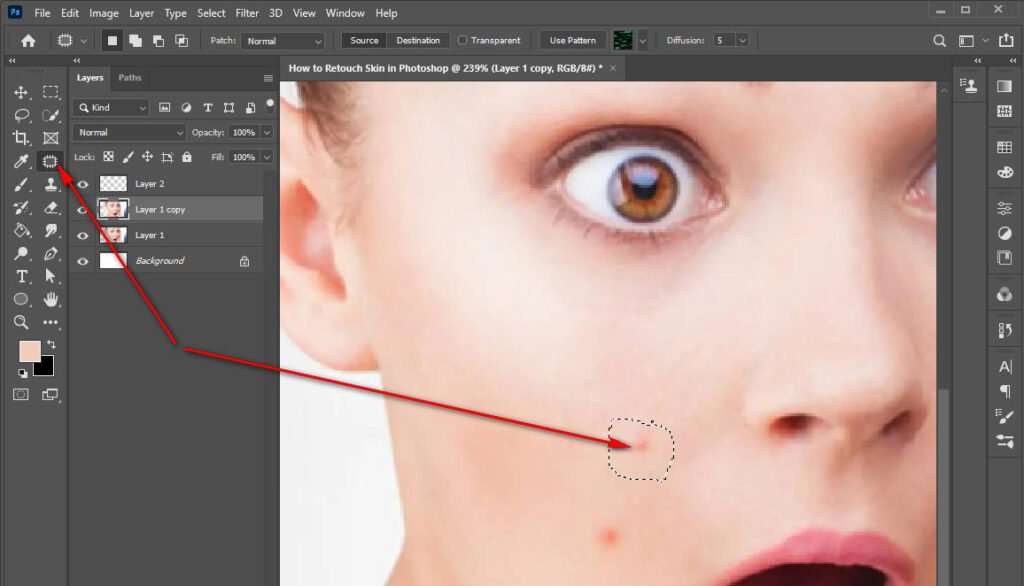
Using a clone stamp is a personal preference, but try to use the clone Stamp only when it comes to skin retouching. The complication that can be raised because of the Colne stamp is, that it can change the skin texture.
Technique 5: Dodging and Burning
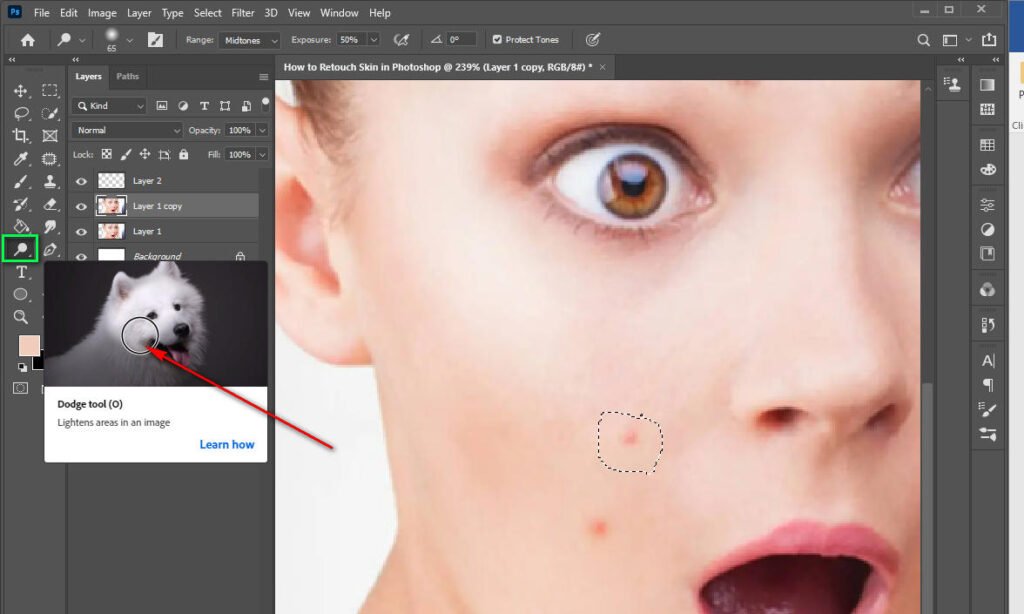
If you are planning to do a lot of editing on skin retouching, dodging and burning is pretty much the best and most versatile technique for you.
To apply this technique, a few steps need to be followed:
Step 1-Maintain a 1% Flow Rate For The Brush
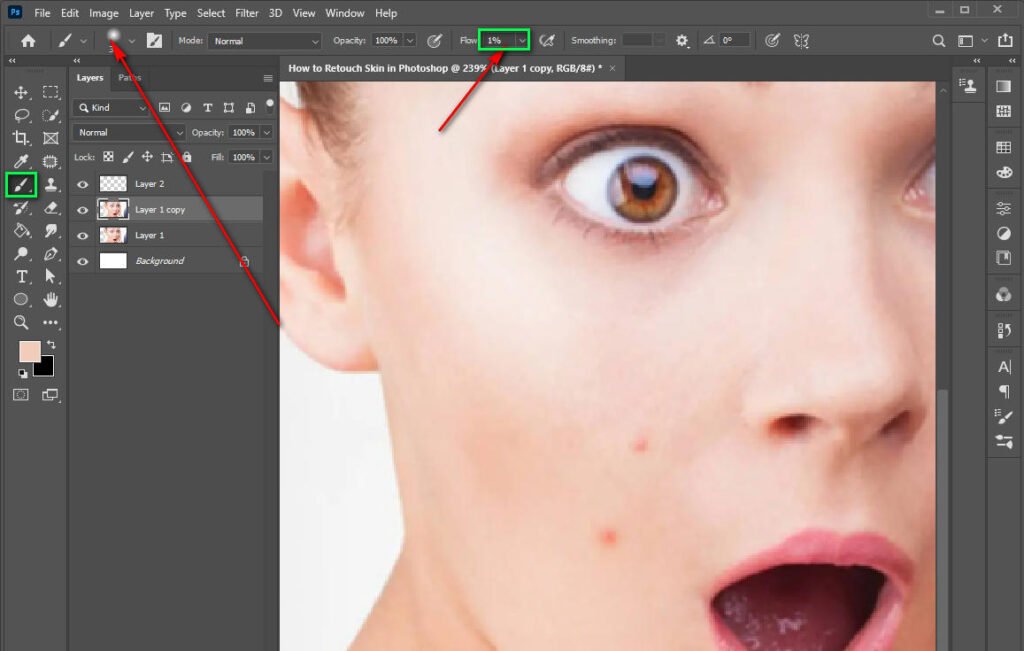
In skin retouching, with all approaches, subtlety is essential. You can build up any adjustments gradually by using brush flow at 1%.
Step 2-Avoid Using Wide Strokes of Color
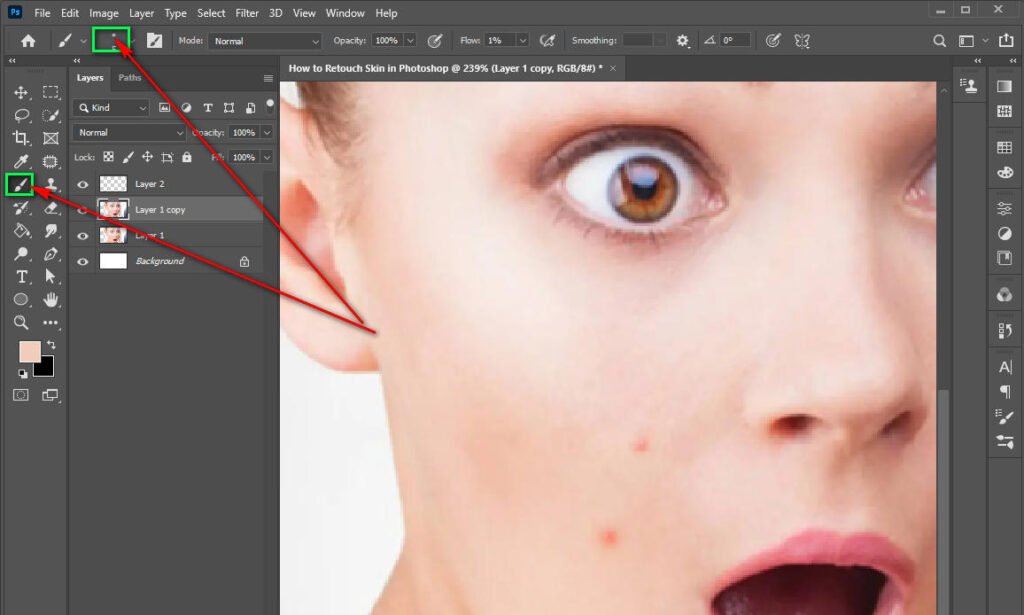
Rather than focusing on one area at a time, make an attempt to change the entire image at once. You will obtain more natural results if you work in smaller regions.
Step 3-Use Numerous Layers
If you are working with both broad strokes and precise detail, dodging and burning in the same image, separate the two processes by using separate layers. Each layer should have its own dedicated layer.
Because of the broad brush strokes, you are more inclined to pay attention to the overall contrast of the painting. Moreover, Gaussian blurs can also be used to smooth out your brush strokes.
Step 4-Make Use of a Tiny Brush
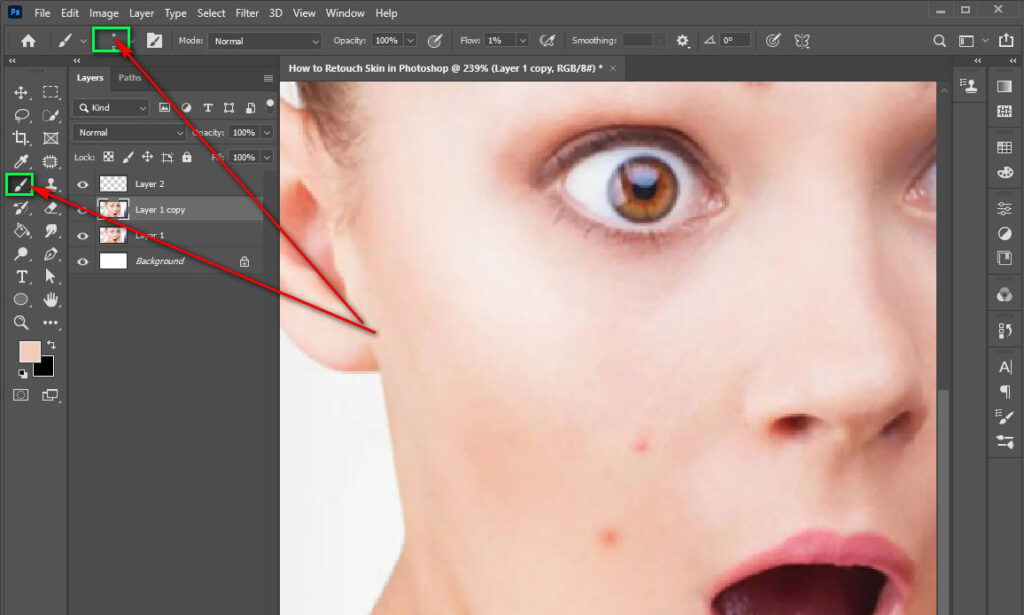
Sometimes the light of your photographs can affect the object’s skin details, which provides contrast. Face-to-face images include imperfections because of this contrast on the skin’s surface.
In order to employ dodge and burn to lighten and darken these little flaws, use a small brush and make sure you are diminishing contrast instead of adding it where you do not want to.
Step 5-Use Ctrl+z (Cmd+z) Sometimes
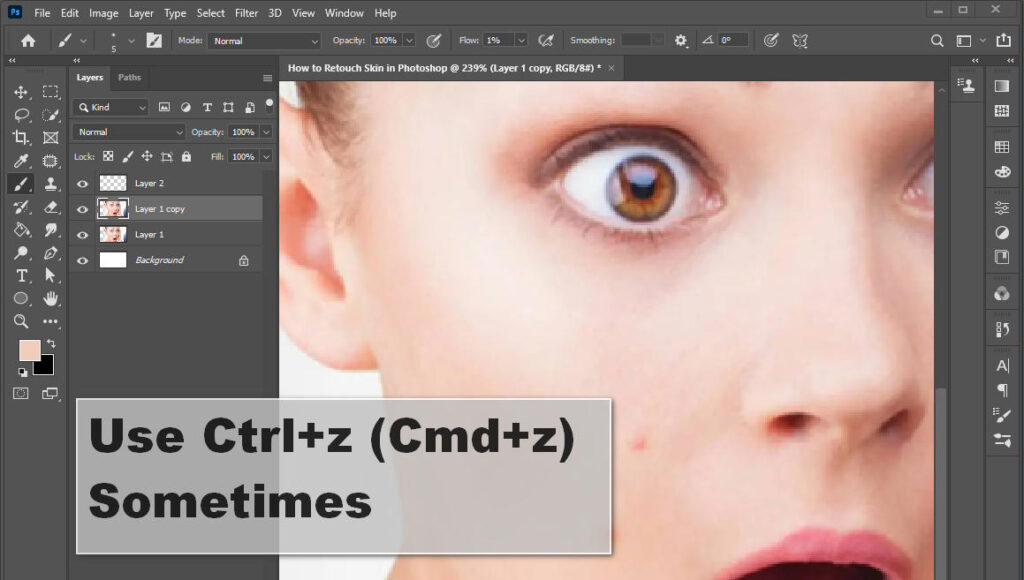
Photoshop’s dodging and burning techniques require a lot of tricks. Sometimes it is very normal that you will misjudge some of the information that your object is providing. So, do not hesitate to undo any action if it does not meet your standards.
Step 6-Decrease the Opacity
If you can produce a better result with less effort, reduce the opacity of the layer in the case of dodging and burning. It is tempting to get carried away and go overboard when using a method that takes so long to perfect. So, a more natural result can be achieved by lowering the effect at the end.
Step 7-Zoom into a Lot
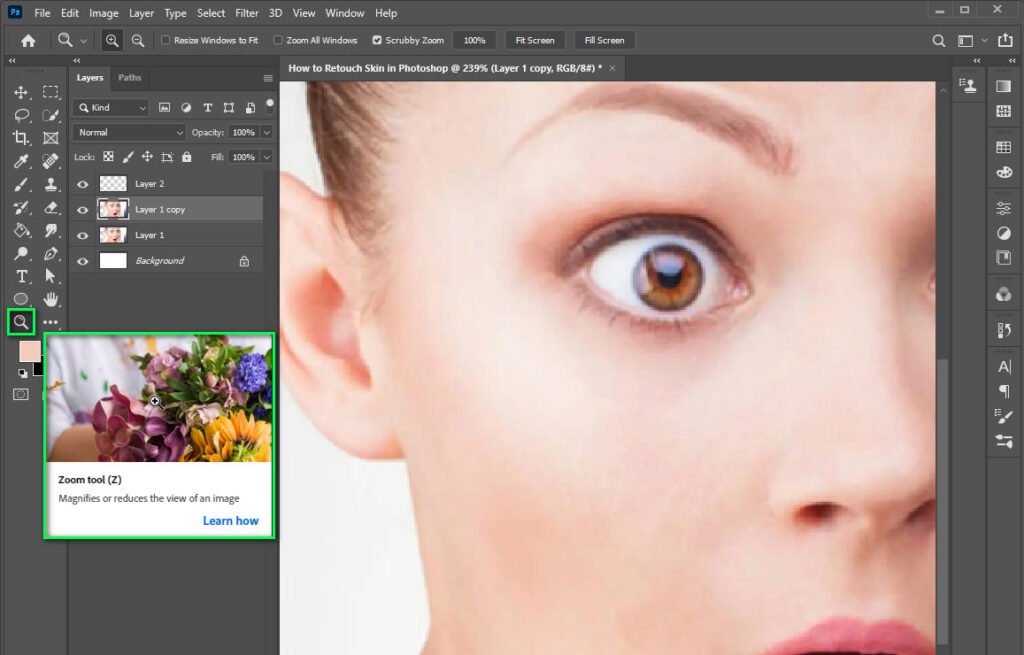
In order to get the greatest results while working with Photoshop in retouching skin, it is ideal to zoom in on that object as much as possible.
It may require zooming in to 300–500% to view all of the fine details. In spite of the fact that operating this method requires a significant amount of time and effort, it will allow you to achieve greater results in retouching.
Frequently Asked Question
What is the technique used in skin retouching?
There are a lot of techniques available for skin retouching people usually apply
- Gaussian blur
- Inverted high-pass
- Frequency Separation
- Dodge & Burn
Bottom Line
Hopefully, you now understand how to retouch skin in Photoshop. There are several techniques, but these are the best ones that the majority of people use. By applying these techniques, you can retouch your object’s skin flawlessly.
